Upcoming Maintenance
Last updated 23 days ago
The Upcoming view is where your schedules turn into a working list. Every asset you've assigned to a schedule shows up here as it nears its due point, with the most urgent at the top — so the first thing you see each morning is what needs attention.
How a Schedule moves toward due
Every schedule passes through three states based on how close it is to its due point. The due point is whatever the schedule runs on — a calendar date, an odometer reading, or an engine-hour count.
Valid — still well ahead of due. It's on a schedule but not close enough to act on, so it stays off this list.
Upcoming — inside the early-warning window ahead of the due point. This is the window you set in Maintenance settings (14 days, 3,500 miles, or 100 engine hours by default), and it's when the asset appears here.
Overdue — past due by at least one unit: one day, one mile, or one engine hour beyond the due point. It flips to overdue the moment it crosses that line.
Reading the Upcoming list
Each row shows:
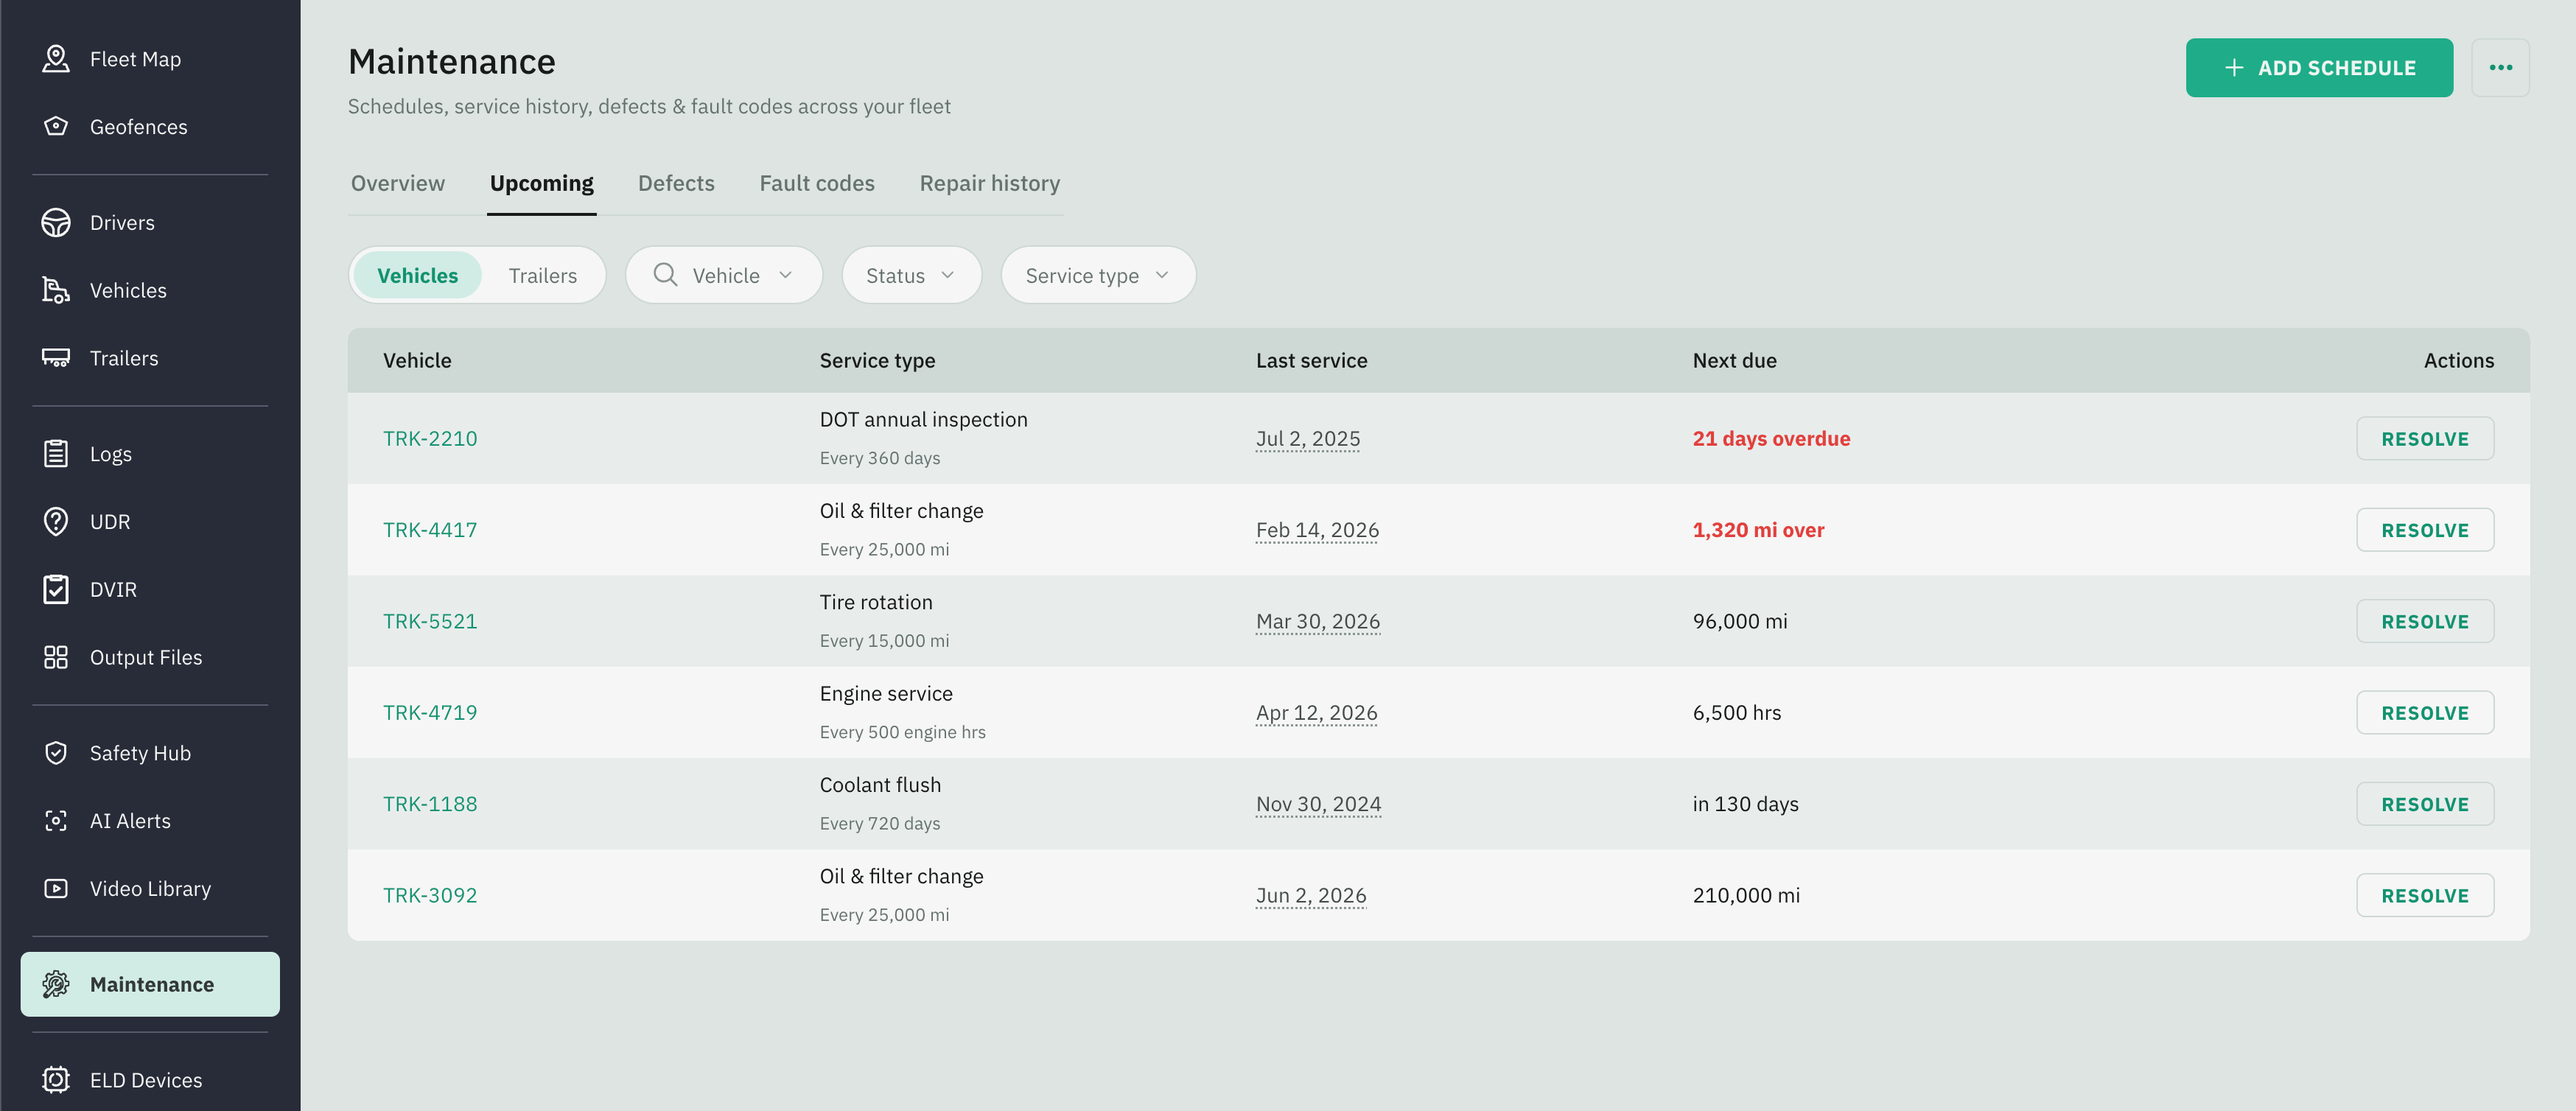
Resolving a Maintenance
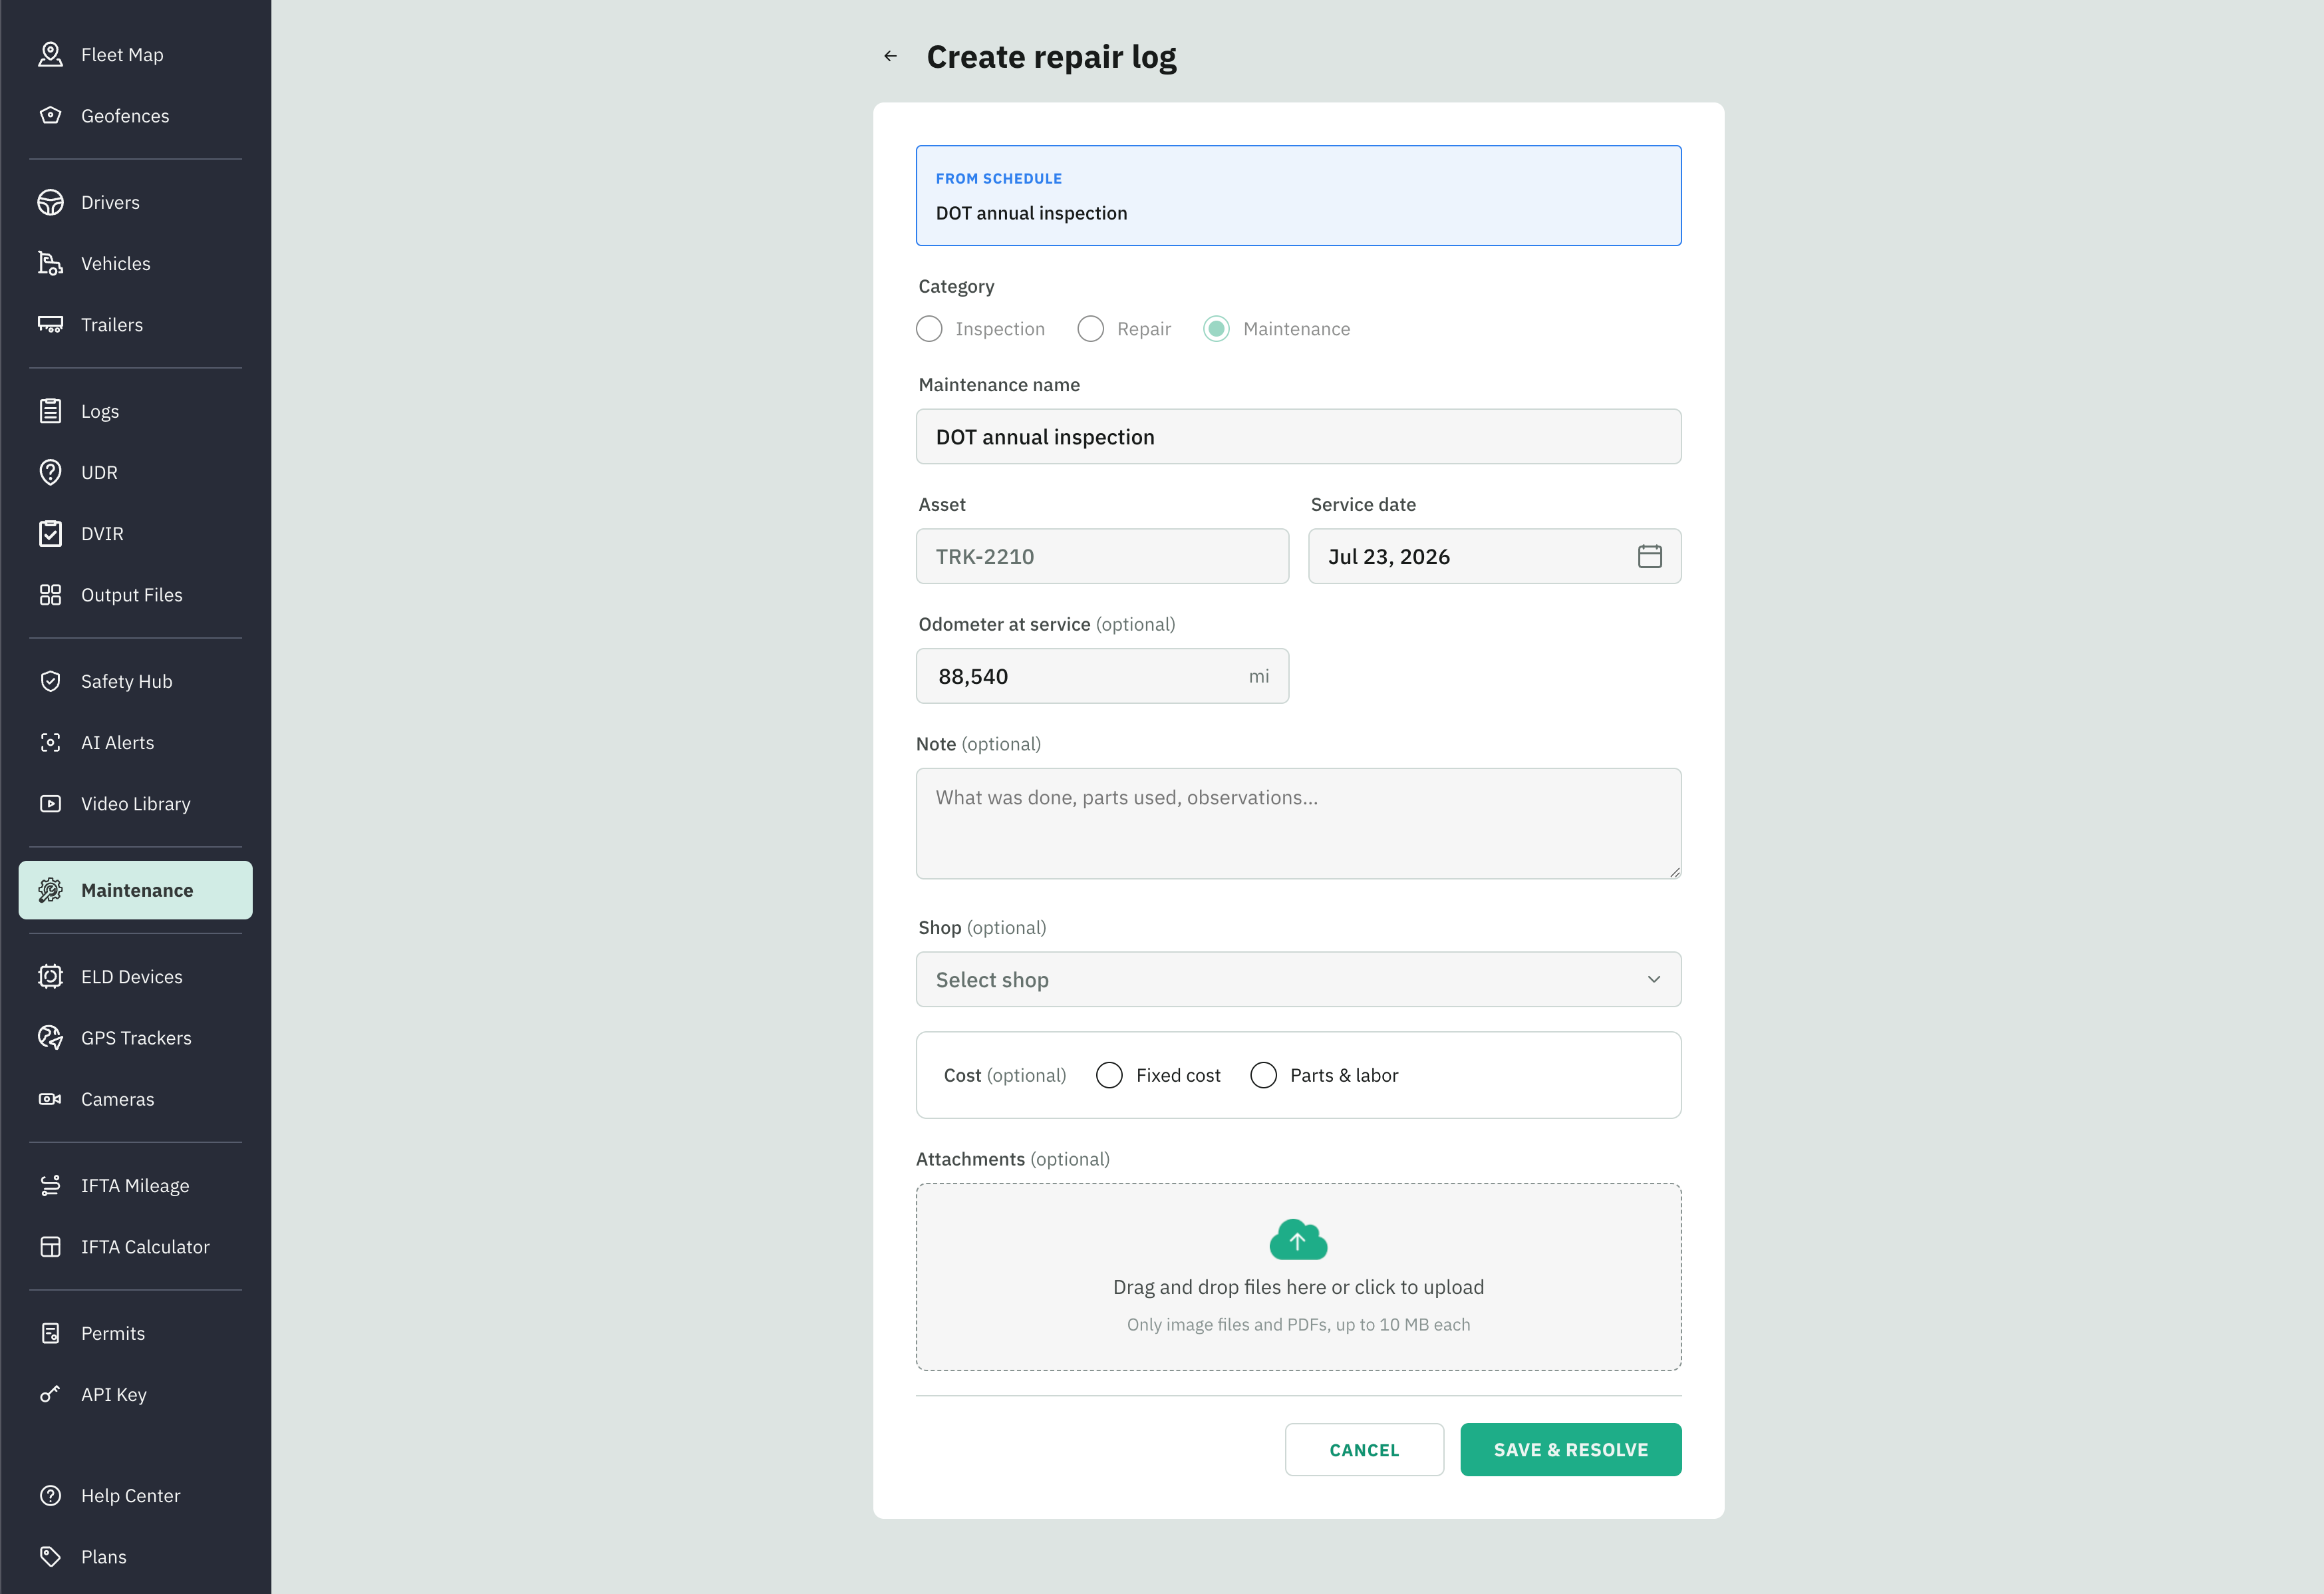
When the job is complete, click Resolve on the row. The pre-filled log repair page for that program opens; however, you can fill in the rest of the information:
Verify if the Service date is correct
Verify if the Odometer at service matches the real number; otherwise, enter it manually
Select the Shop where the maintenance was performed
Add the Cost, whether it is a Fixed cost or you can add the cost of the Parts used for this maintenance and the cost of Labor
Attach the proof file and click Save & Resolve.
Once resolved, it is logged in the Repair History tab.