Install a Dual Dash Camera
Last updated 25 days ago
Overview
The AI Dual Camera pairs a road-facing and cabin-facing camera with a Gateway Hub that connects to the vehicle through its diagnostic port. The hub ships with a SIM card and Micro SD card pre-installed, so no card setup is required on your end.
The only vehicle requirement is a diagnostic port:
OBD-II port — light-duty vehicles
J1939 port — medium- and heavy-duty vehicles
This guide covers hardware installation and LED verification.
What's in the box
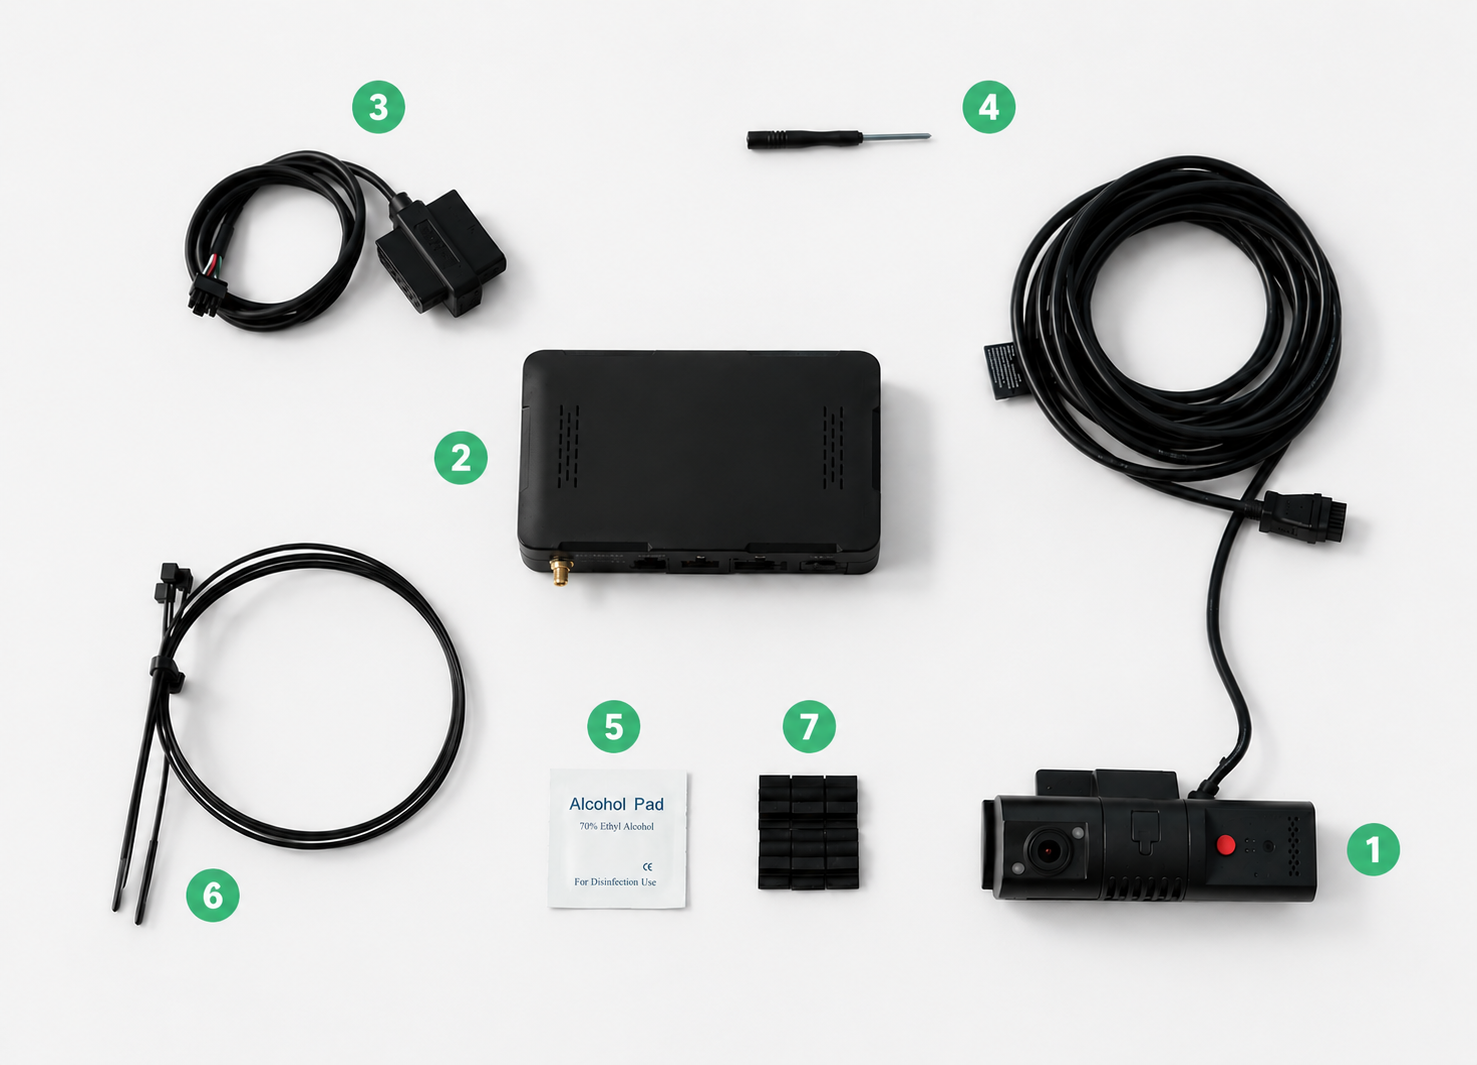
AI Dual Camera + cable
Gateway Hub (SIM card and Micro SD card pre-installed)
OBD-II power cable / J1939 cable
Safety screwdriver
Alcohol wipes
Zip ties
Cable clips
Before you start
Check the windshield for cracks or chips.
Turn on the vehicle and confirm no Malfunction Indicator Lights (MILs), error codes, or warnings are present on any display.
For OBD-II connections, confirm no other third-party devices are connected to the OBD-II port.
Record the Gateway IMEI and the vehicle name.
Install the Gateway Hub — OBD-II
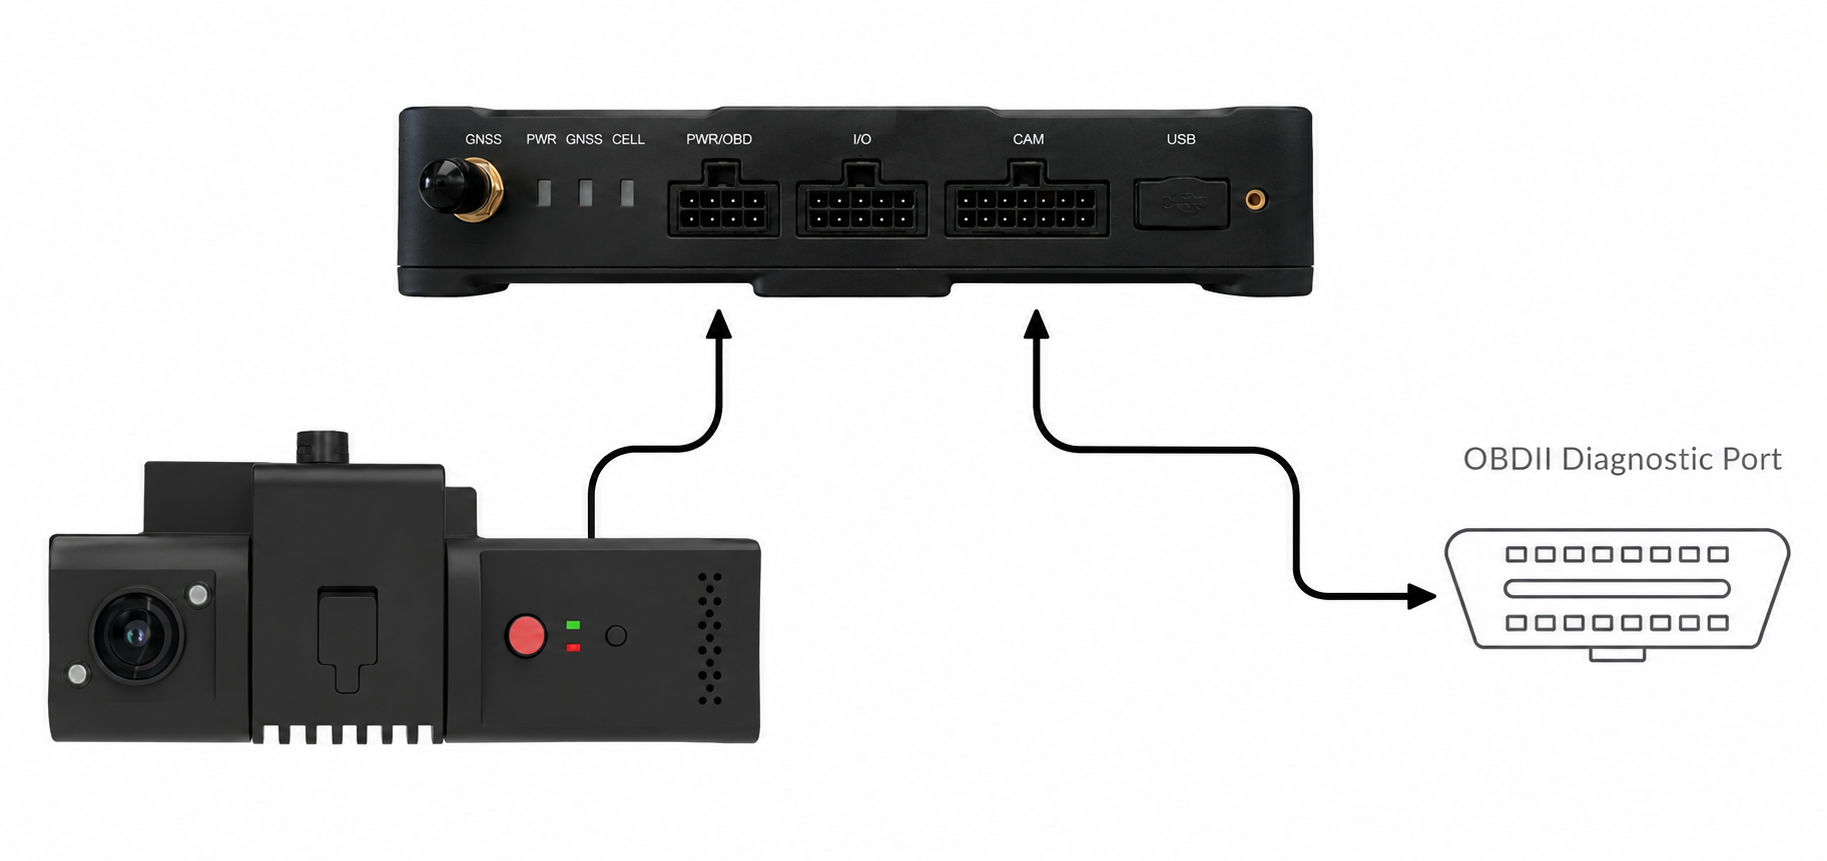
Locate the OBD-II port — typically beneath the dashboard on the driver's side, near the steering column.
Connect the hub — plug the OBD-II power cable into the port, then connect the other end to the PWR/OBD port on the Gateway Hub.
Secure the hub — mount the Gateway Hub underneath the dashboard or behind the diagnostic port, making sure it is fastened and does not obstruct vehicle operation.
Organize cables — route cables away from pedals, controls, and the driver. Secure with the included zip ties or cable clips.
Check power — the green power LED on the hub should light up, confirming the connection.
Note
Place the device under the dash in a well-ventilated area. Do not block or cover the air vents — proper airflow is required for safe, reliable operation.
Install the Gateway Hub — J1939
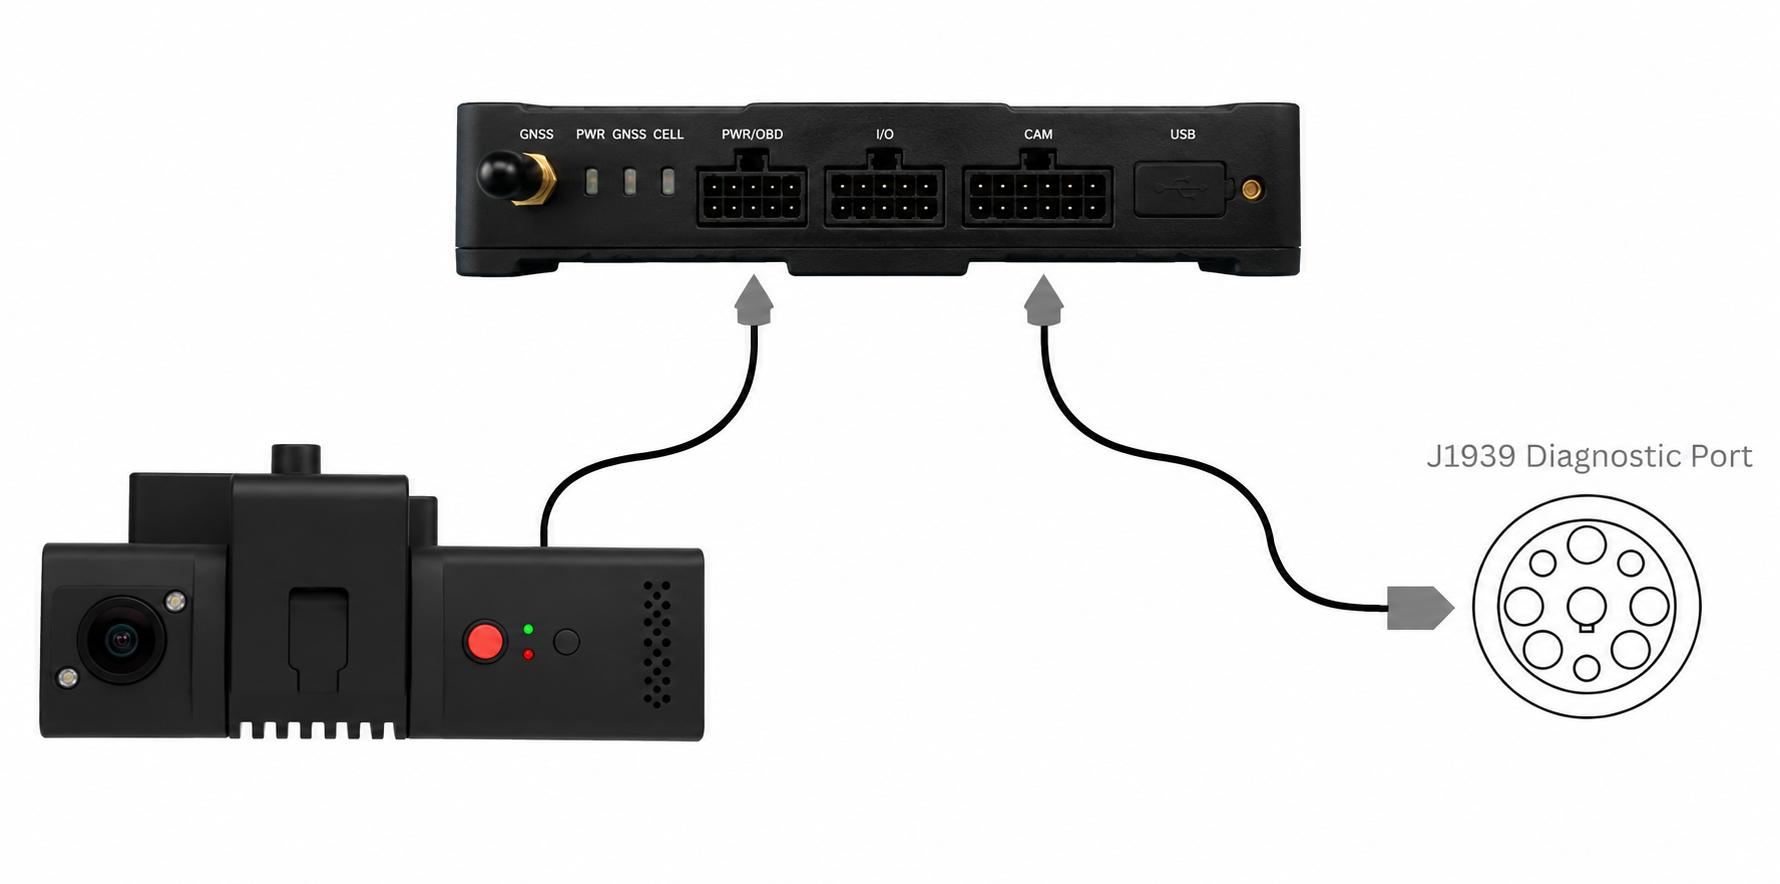
Locate the J1939 port — look for a round 9-pin Deutsch connector, usually beneath the dash or near the driver's seat.
Connect the hub — plug the J1939 cable into the diagnostic port, then connect the other end to the PWR/OBD port on the Gateway Hub.
Secure the hub — fasten the Gateway Hub in a hidden location under the dash. Avoid areas that heat up or shift during driving, and make sure it does not obstruct vehicle operation.
Organize cables — route cables away from pedals, controls, and the driver. Secure with the included zip ties or cable clips.
Check power — the green power LED on the hub should light up, confirming the connection.
Note
Place the device under the dash in a well-ventilated area. Do not block or cover the air vents — proper airflow is required for safe, reliable operation.
Mount the camera
Select the mounting location — position the camera on the windshield below the rearview mirror and above the windshield sweep area. Make sure the camera has a clear view of the road ahead and the vehicle cabin.
Prepare the surface — clean the windshield with the provided alcohol wipe to ensure proper adhesion of the 3M mounting pad.
Secure the camera — peel the protective backing from the 3M mounting pad, press the camera firmly against the windshield, and hold for a few seconds to form a strong bond.
Adjust the camera angle — use the safety screwdriver to unlock the camera and adjust its road-facing and cabin-facing angles. Tighten the locking screw once set.
Route the camera cable — run the cable along the top edge of the windshield. Use the cable clips or tuck the cable under the glass seal to secure it.
Connect to the Gateway Hub — attach the camera cable to the CAM port on the Gateway Hub.
Verify operation — check the status LED on the camera to confirm it is powered on and operational.
Note
Remove all red protective stickers from the camera lenses. Leaving them on will degrade video quality and may obstruct the camera's view.
Next steps
Once the hub is physically installed and powered, continue to Activate & Assign a Dash Camera to finish setup.