Manage Preventive Schedules
Last updated 23 days ago
A schedule is a recurring service — a DOT annual inspection, an oil change, a brake check — with a set frequency and a list of assets it applies to. Once a schedule is in place, every assigned asset shows up on your Upcoming view as it approaches its due point, so you're not tracking service dates by hand.
Where Schedules live
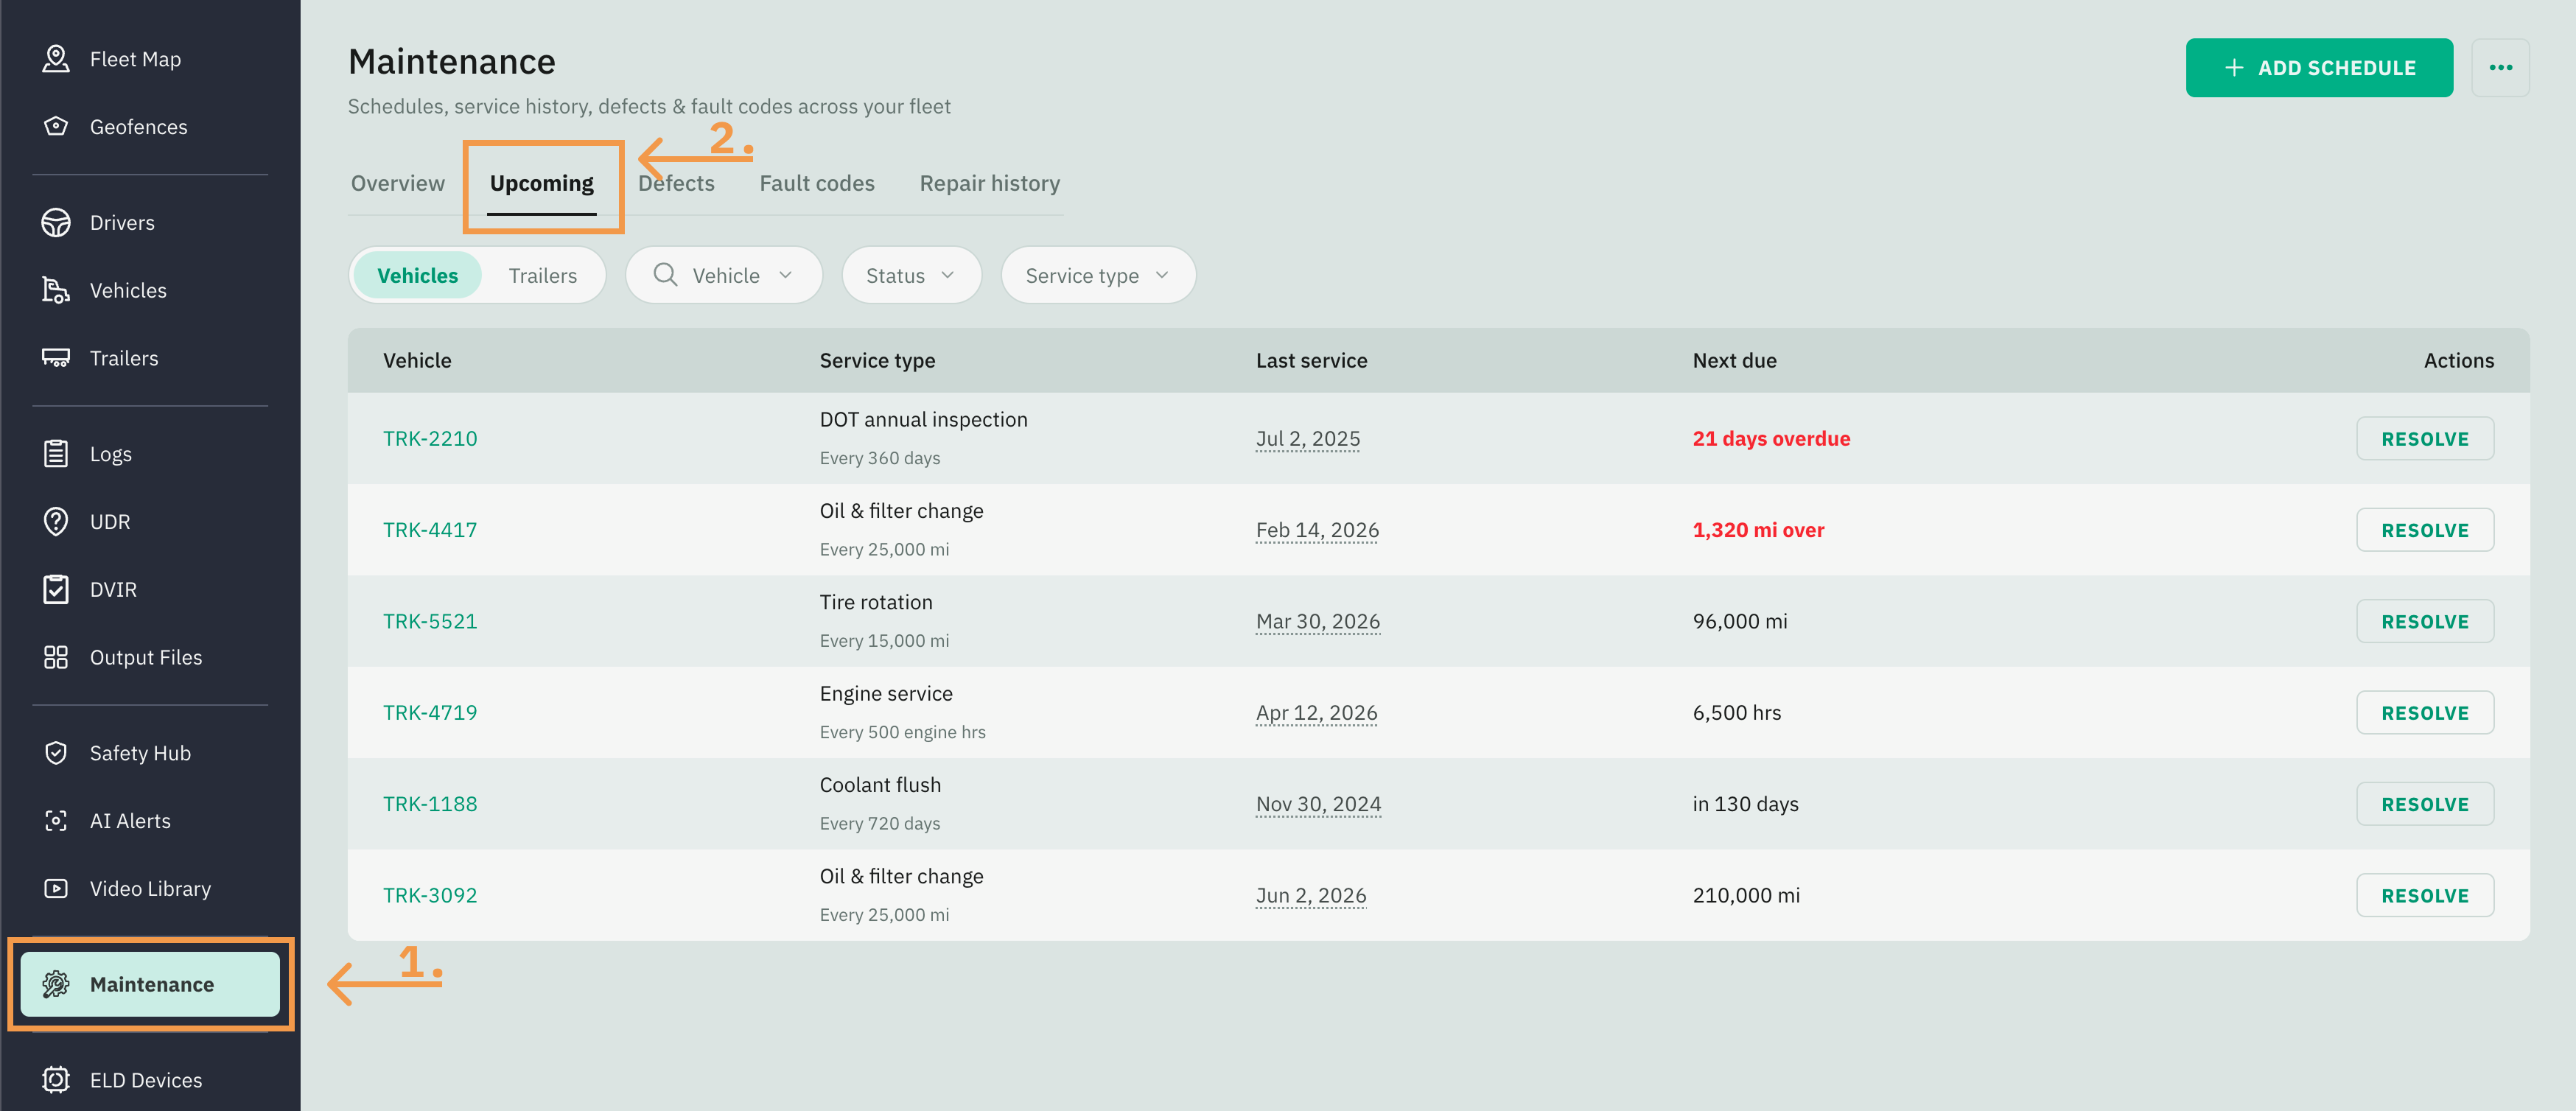
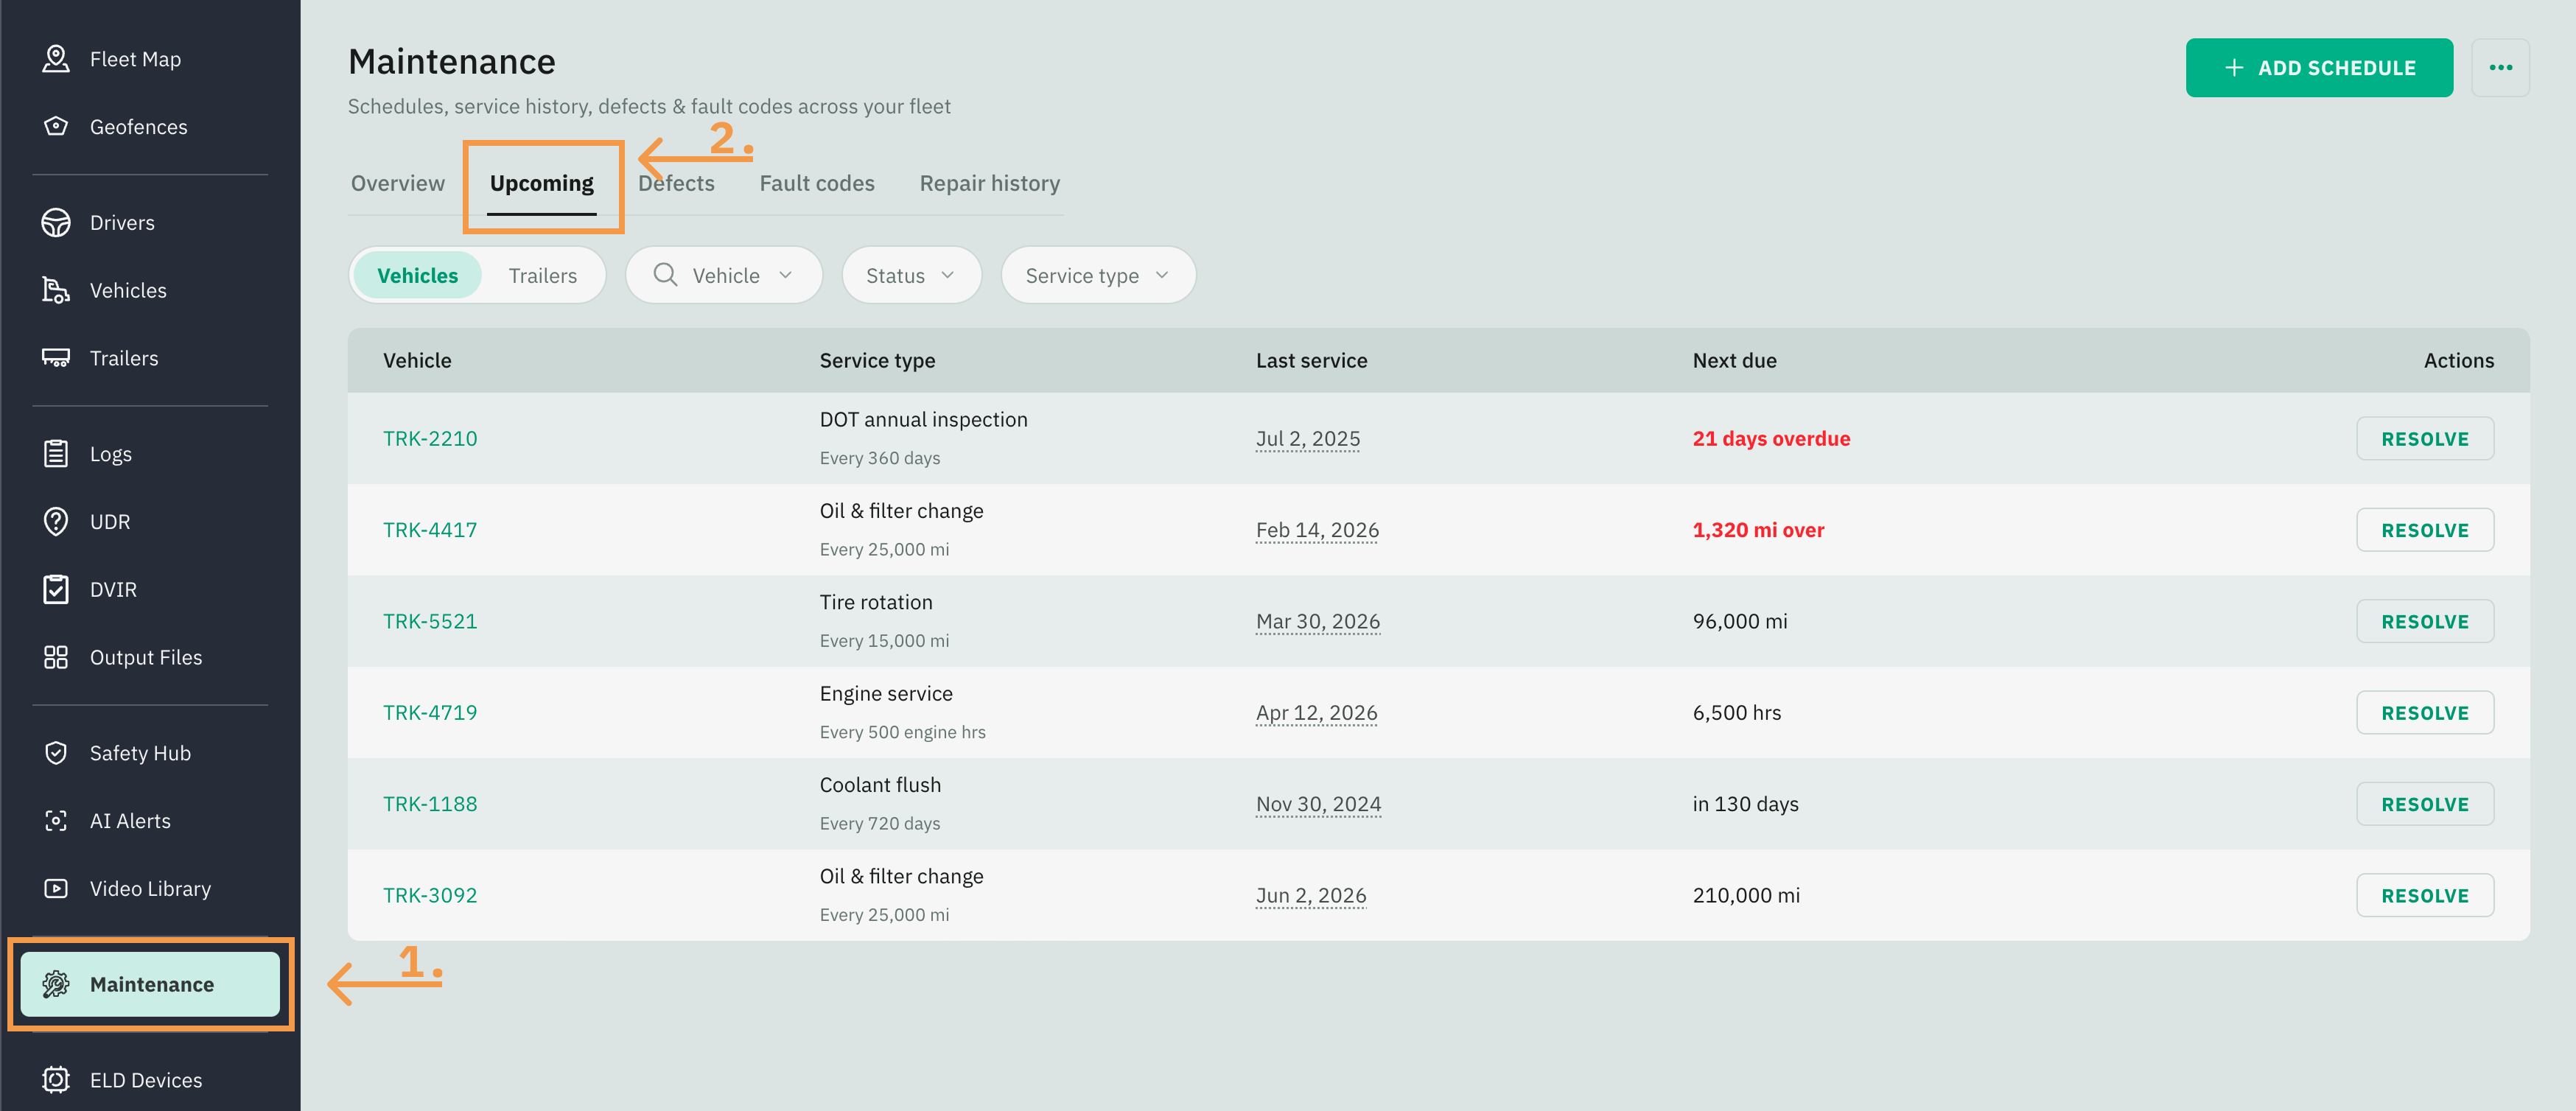
Go to Fleet Portal and click on the Maintenance tab from the sidebar menu
Select the Upcoming tab
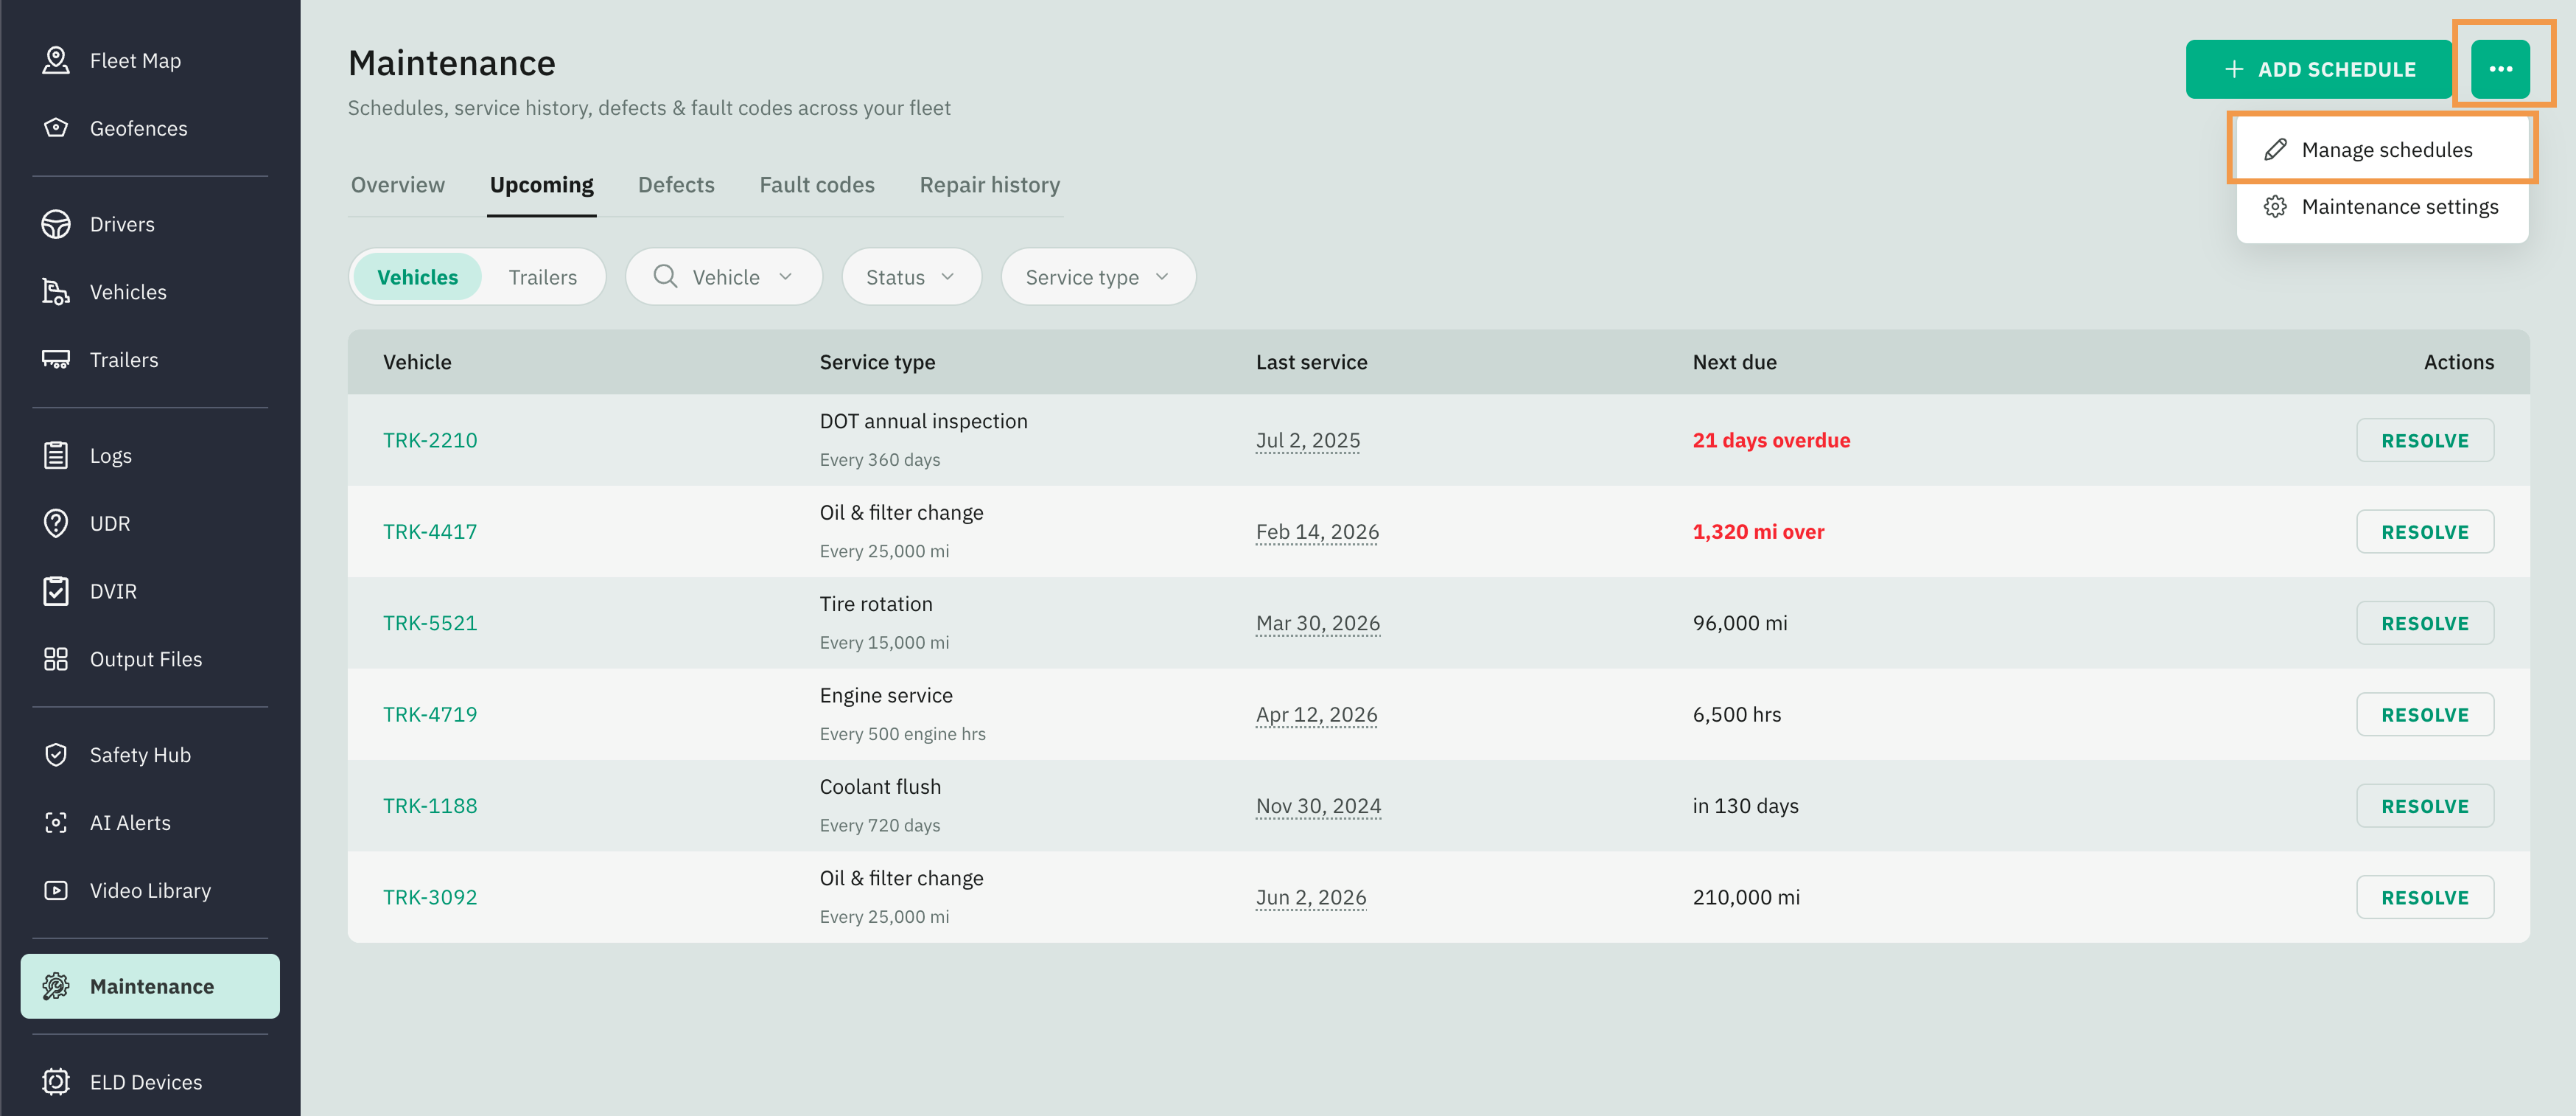
Open Manage schedules from the Actions menu (the three-dots button at the top right of Maintenance).
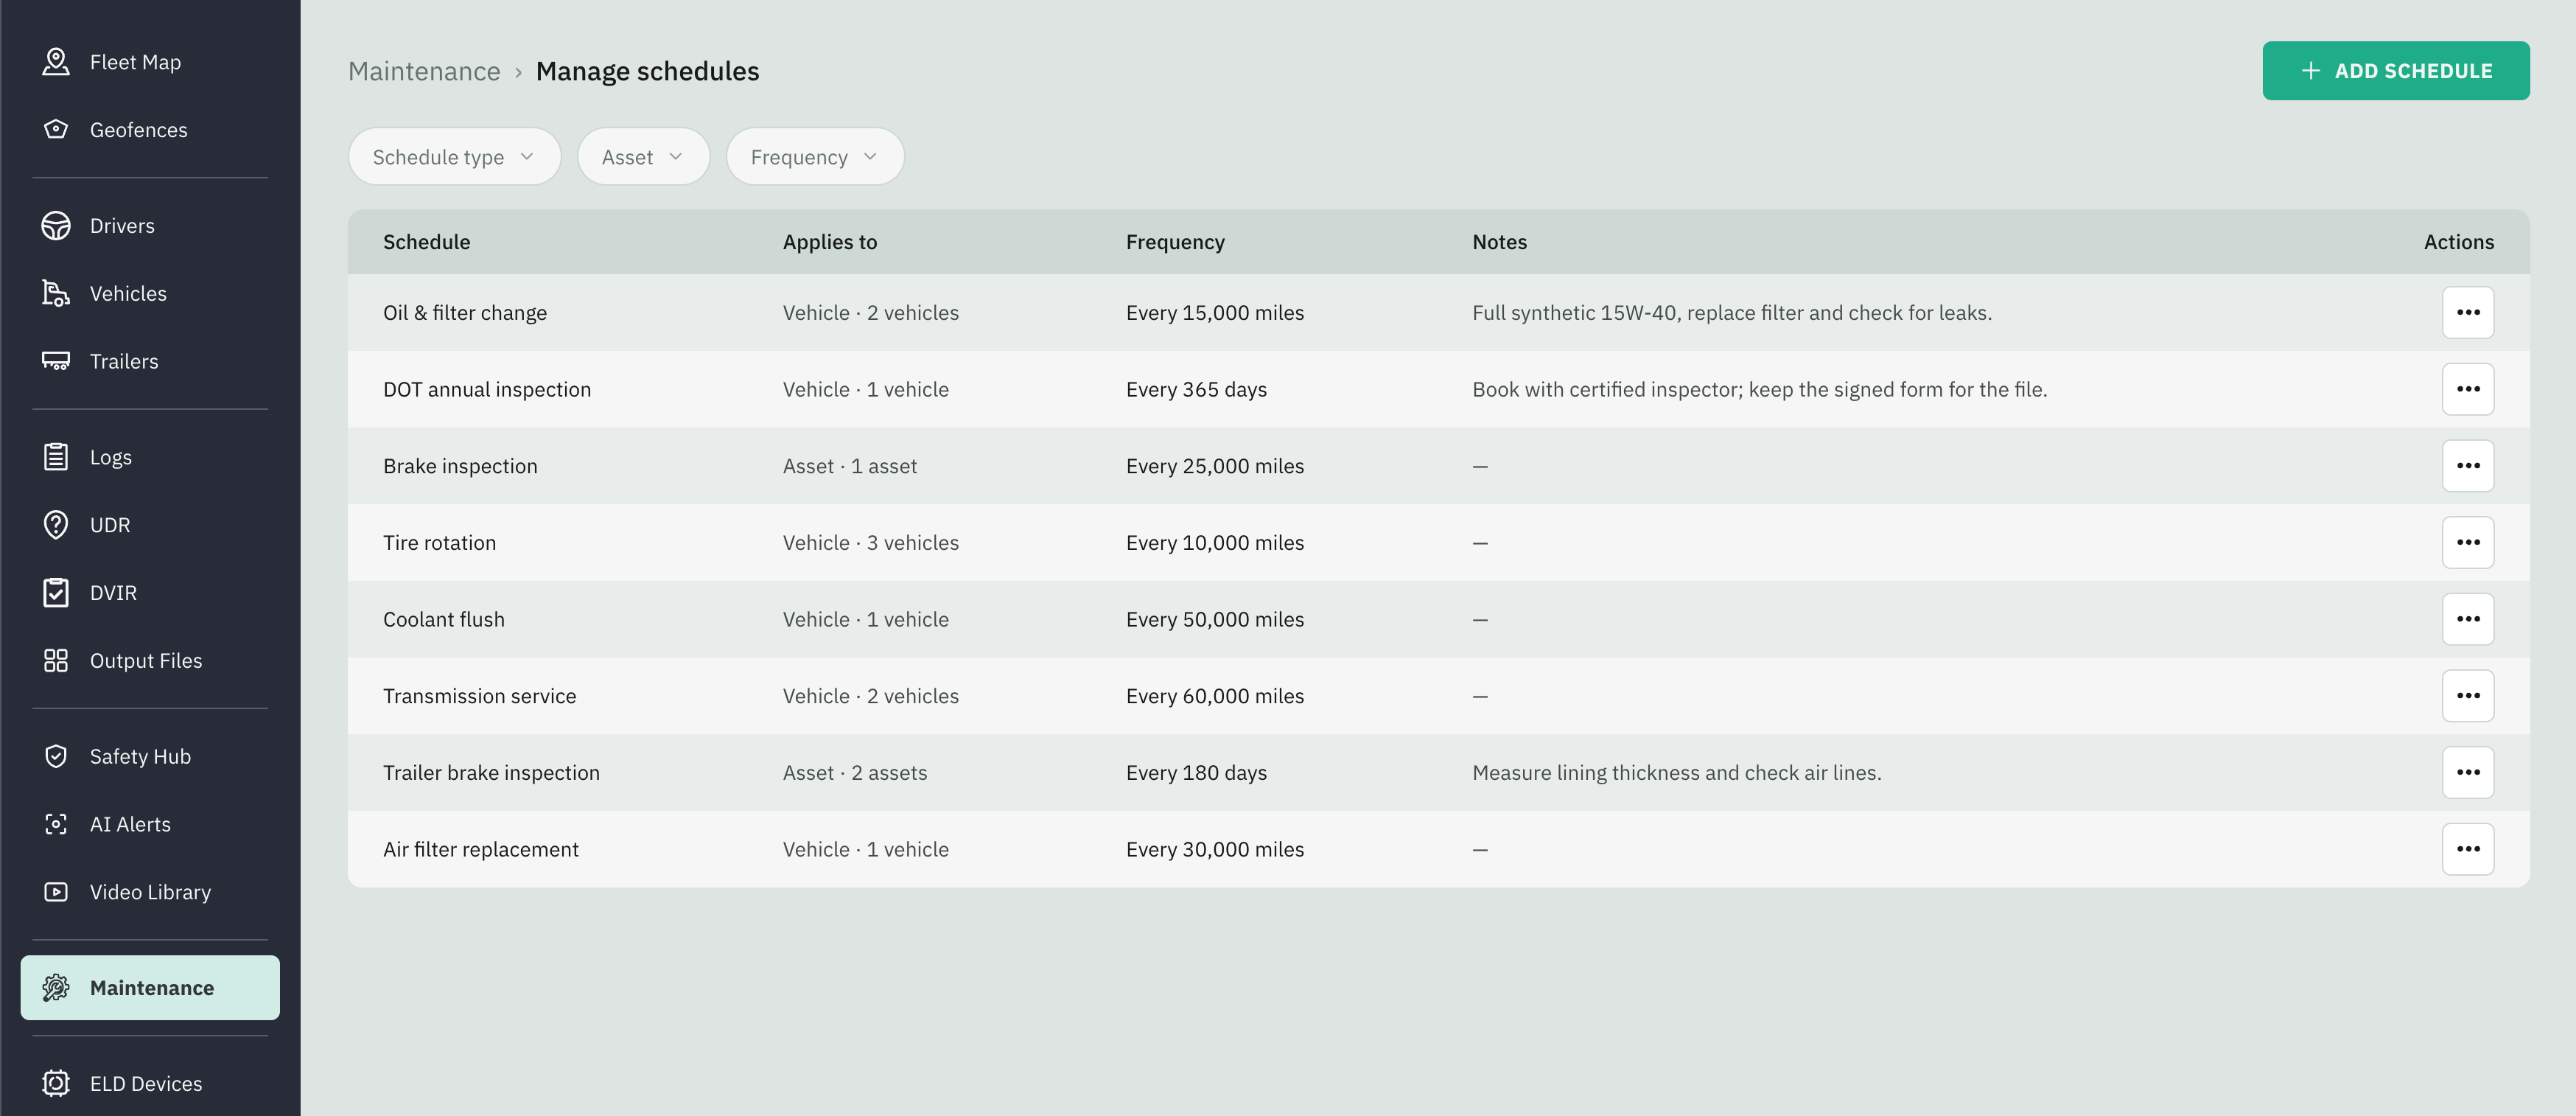
Reading the Schedule List
Each row shows:
Creating a Schedule
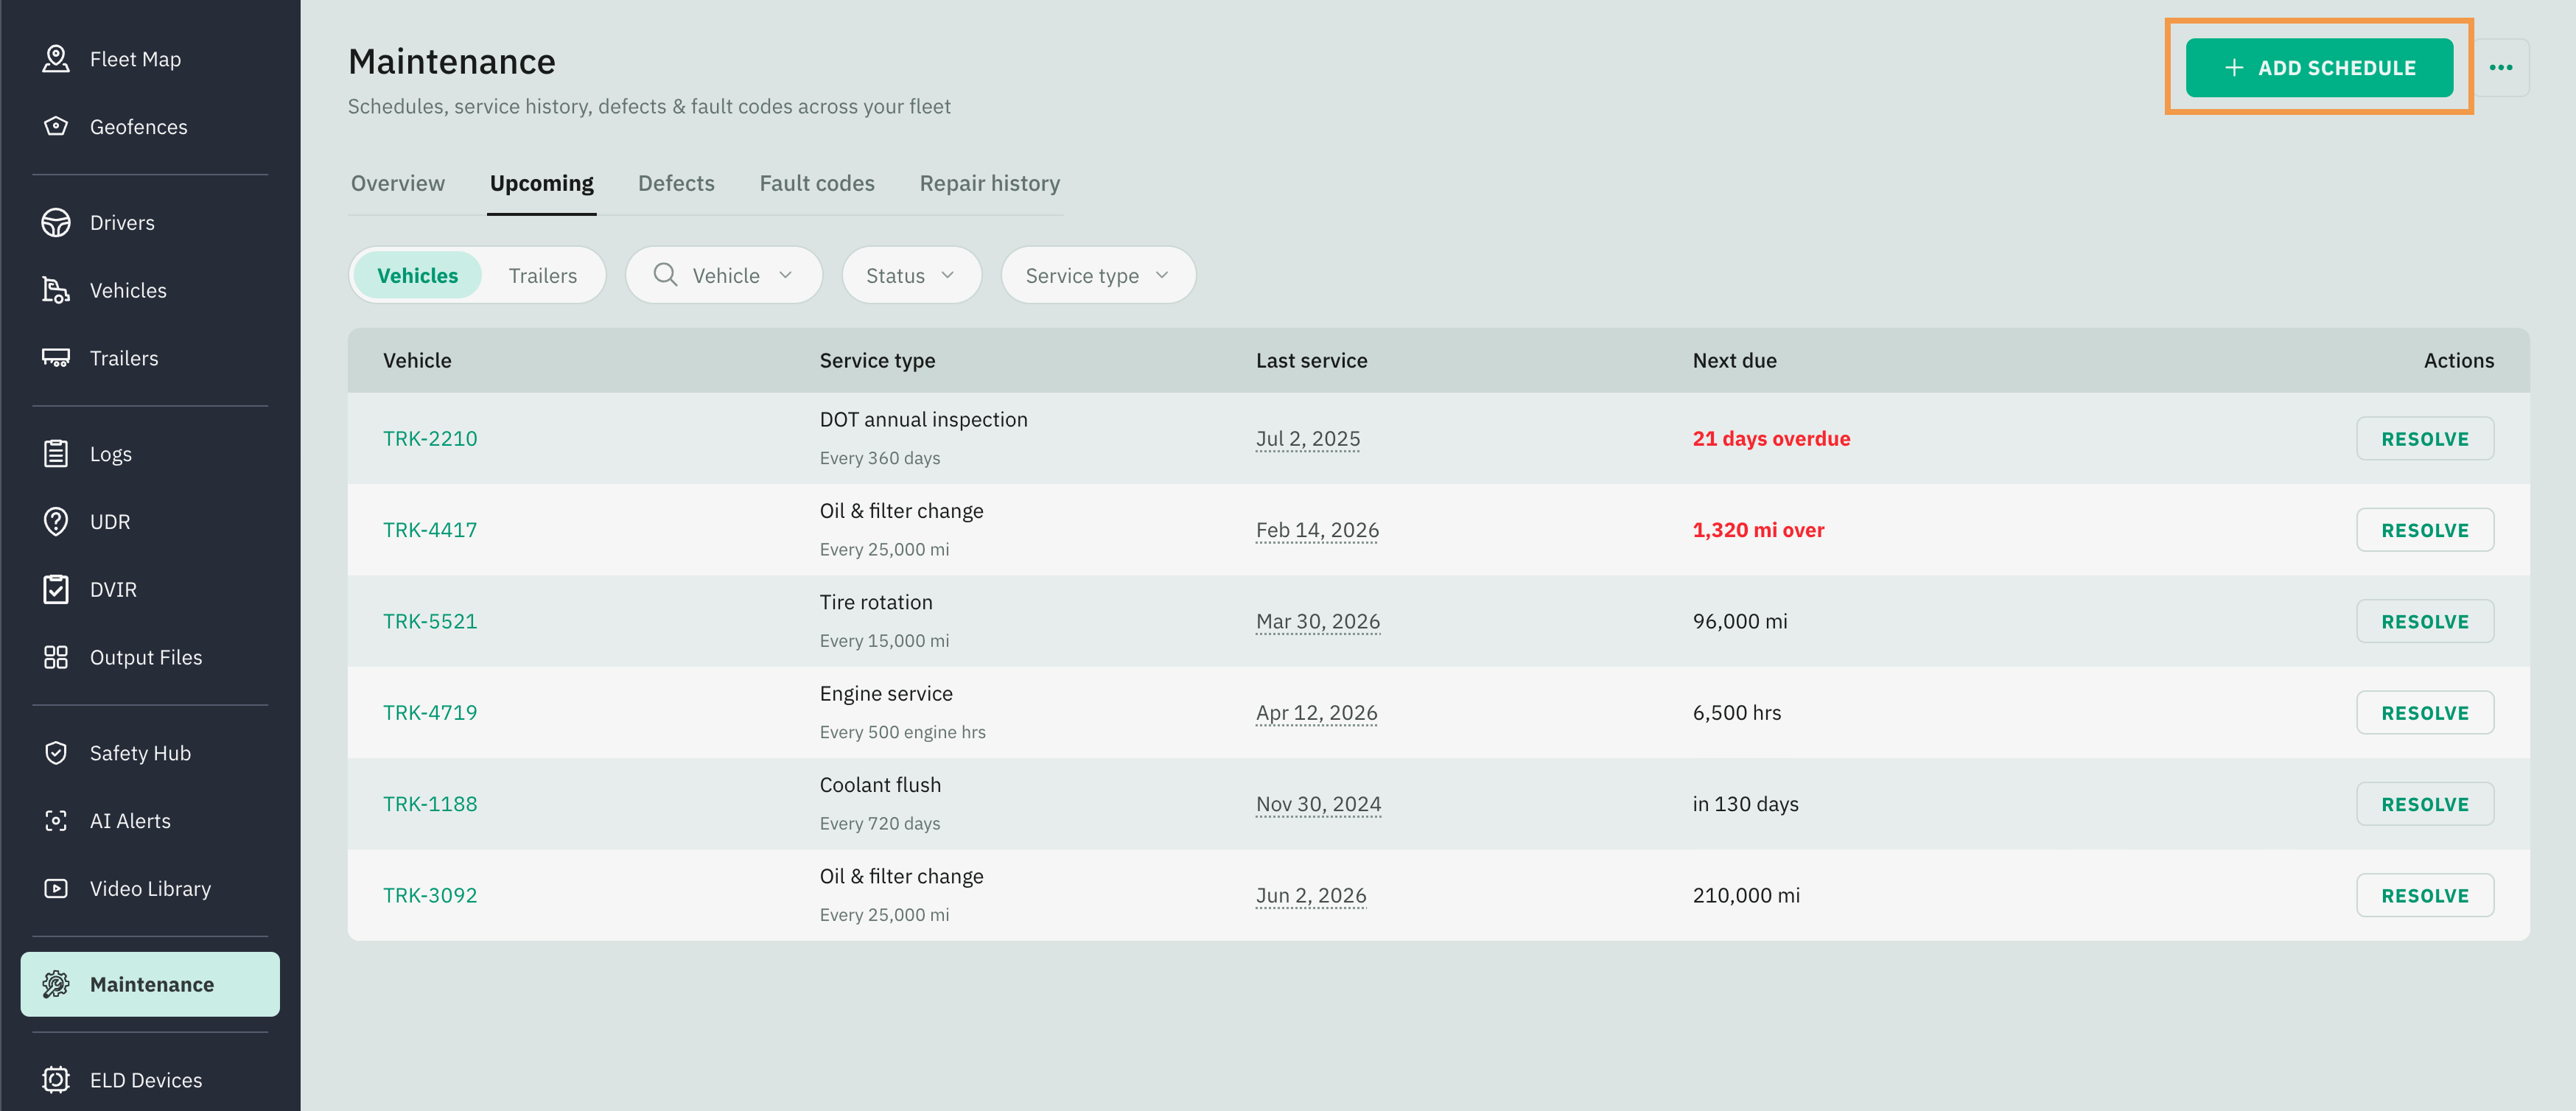
You can create a schedule from two places: the Add schedule button on the Upcoming view, or the schedule editor reached from Manage schedules. Both open the same form.
Go to Fleet Portal and click on the Maintenance tab from the sidebar menu
Select the Upcoming tab
Click Add Schedule to open the editor
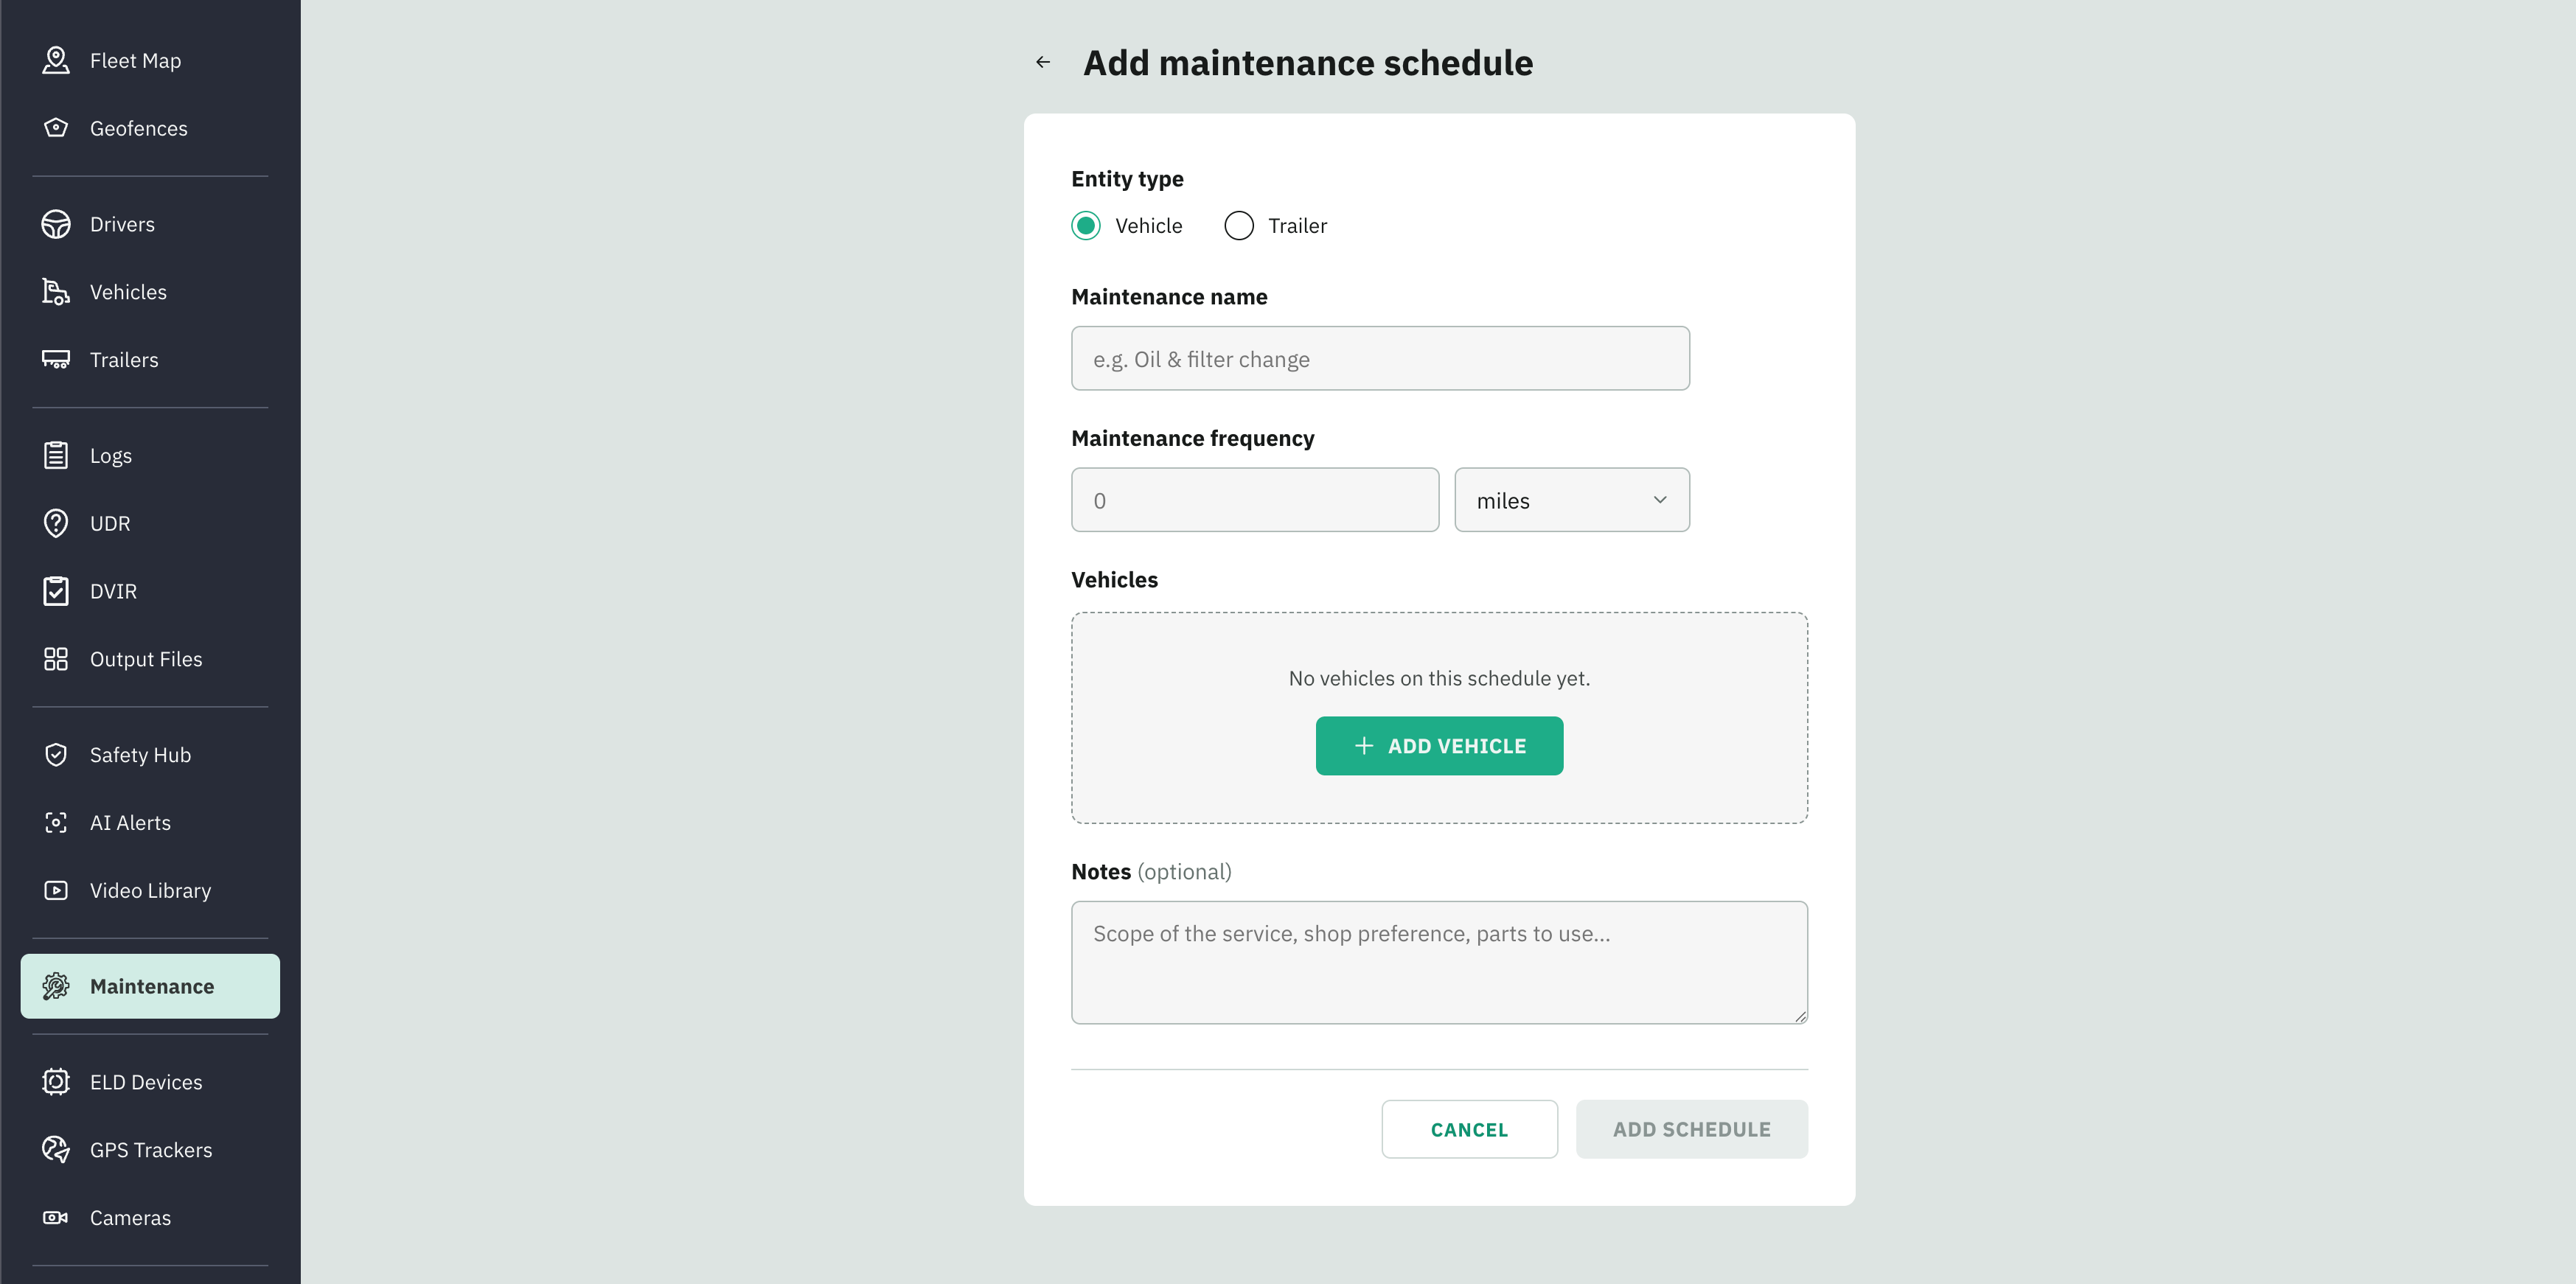
Fill it from top to bottom:
Choose the Entity type
Introduce the Maintenance name
Select the frequency type (miles, days, or engine hours)
Enter the Maintenance frequency
Assign Vehicles to the schedule
Click Add Schedule
Editing a Schedule
Open the Manage Schedules page
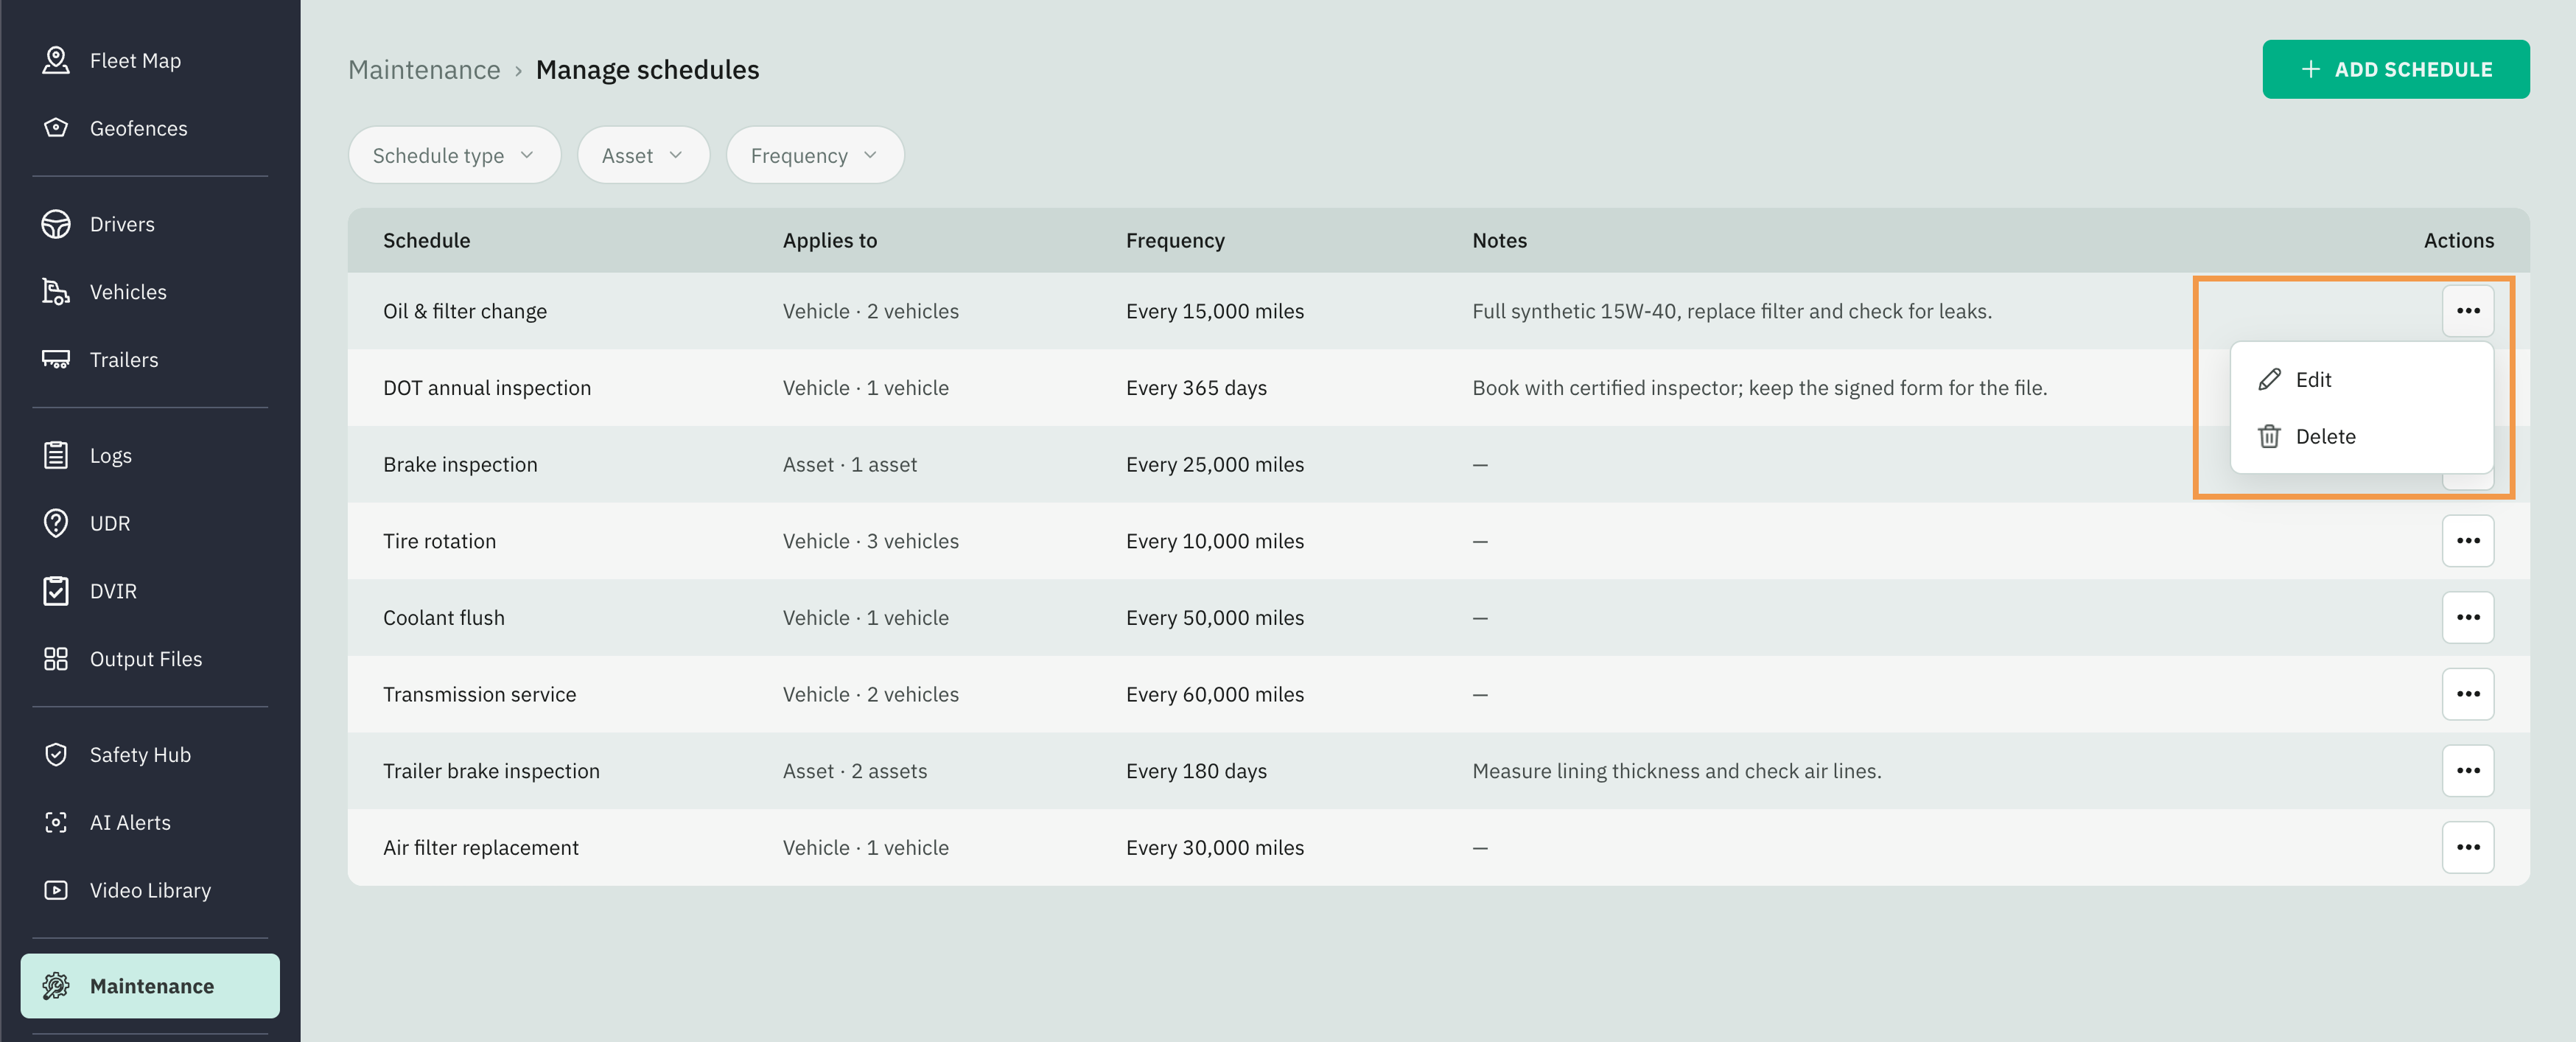
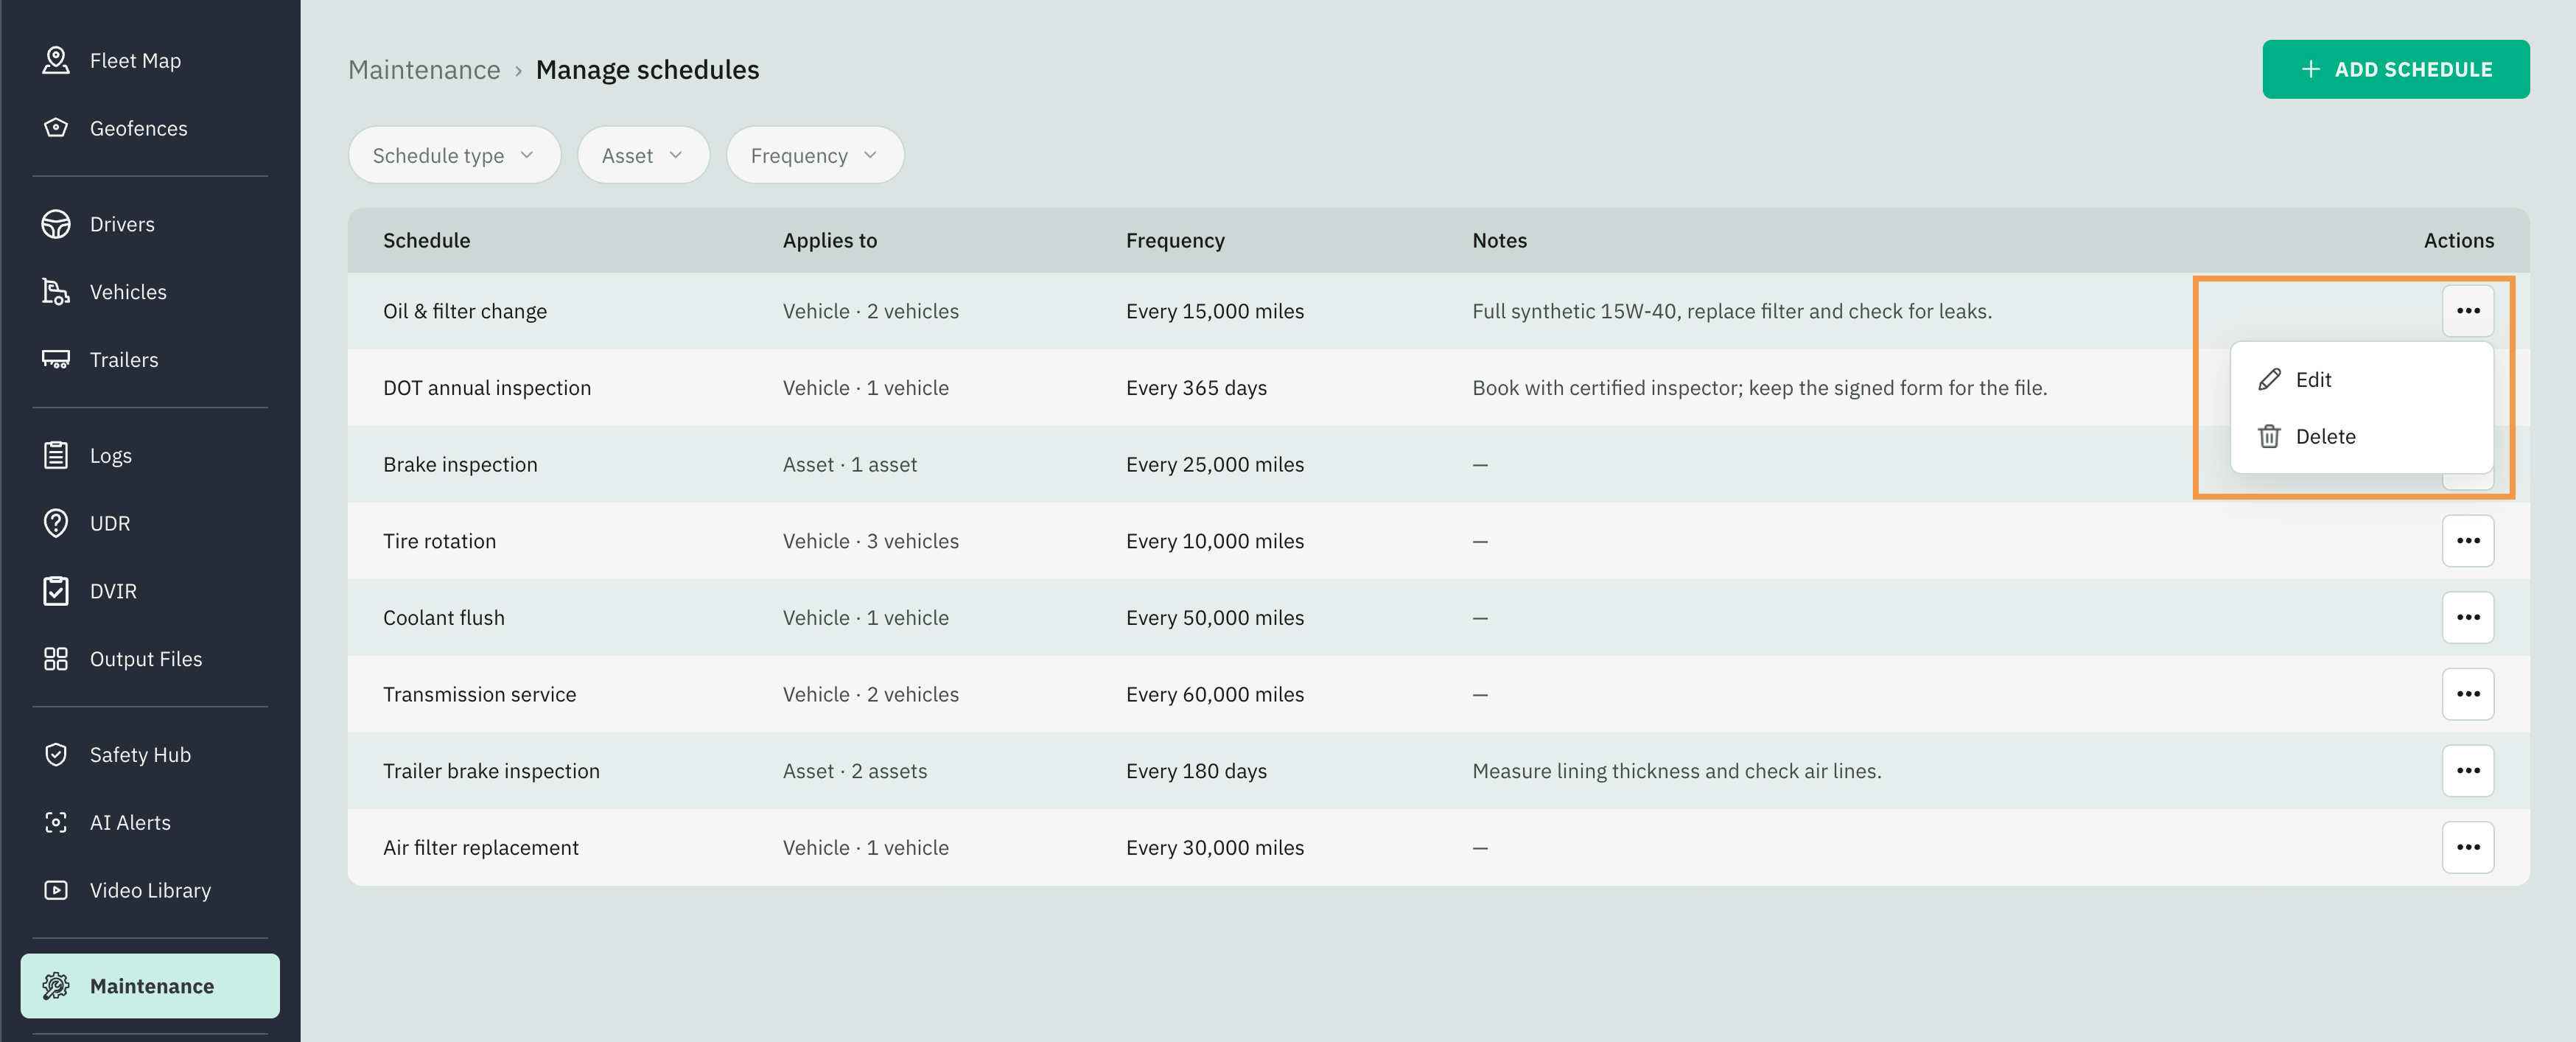
Open a schedule's Actions menu and choose Edit to reopen it in the editor. You can rename it, change its frequency, add or remove assets, and update notes.
Deleting a Schedule
Open the Manage Schedules page
Open a schedule's Actions menu and choose Delete to remove it from the system.