Install a Vehicle Tracker - GS900
Last updated 2 months ago
Overview
The GS900 is a wired GPS vehicle tracker with 4G/2G connectivity and GPS/BDS satellite positioning. This guide walks you through installing and verifying the device. A SIM card is pre-installed before shipping, so no SIM setup is required on your end.
It can be used across different vehicle types and weight classes, from passenger vehicles to heavy trucks and trailers.
Installation takes about 10–15 minutes and requires basic access to the vehicle's 12V battery.
What's in the box
GS900 tracker with wiring harness (red and black wires connected; orange and yellow wires are unused and factory-insulated)
Pre-installed inline fuse on the red wire
Pre-installed SIM card (inside the device)
You'll also need: cable ties or sponge double-sided tape to secure the device.
Before you start
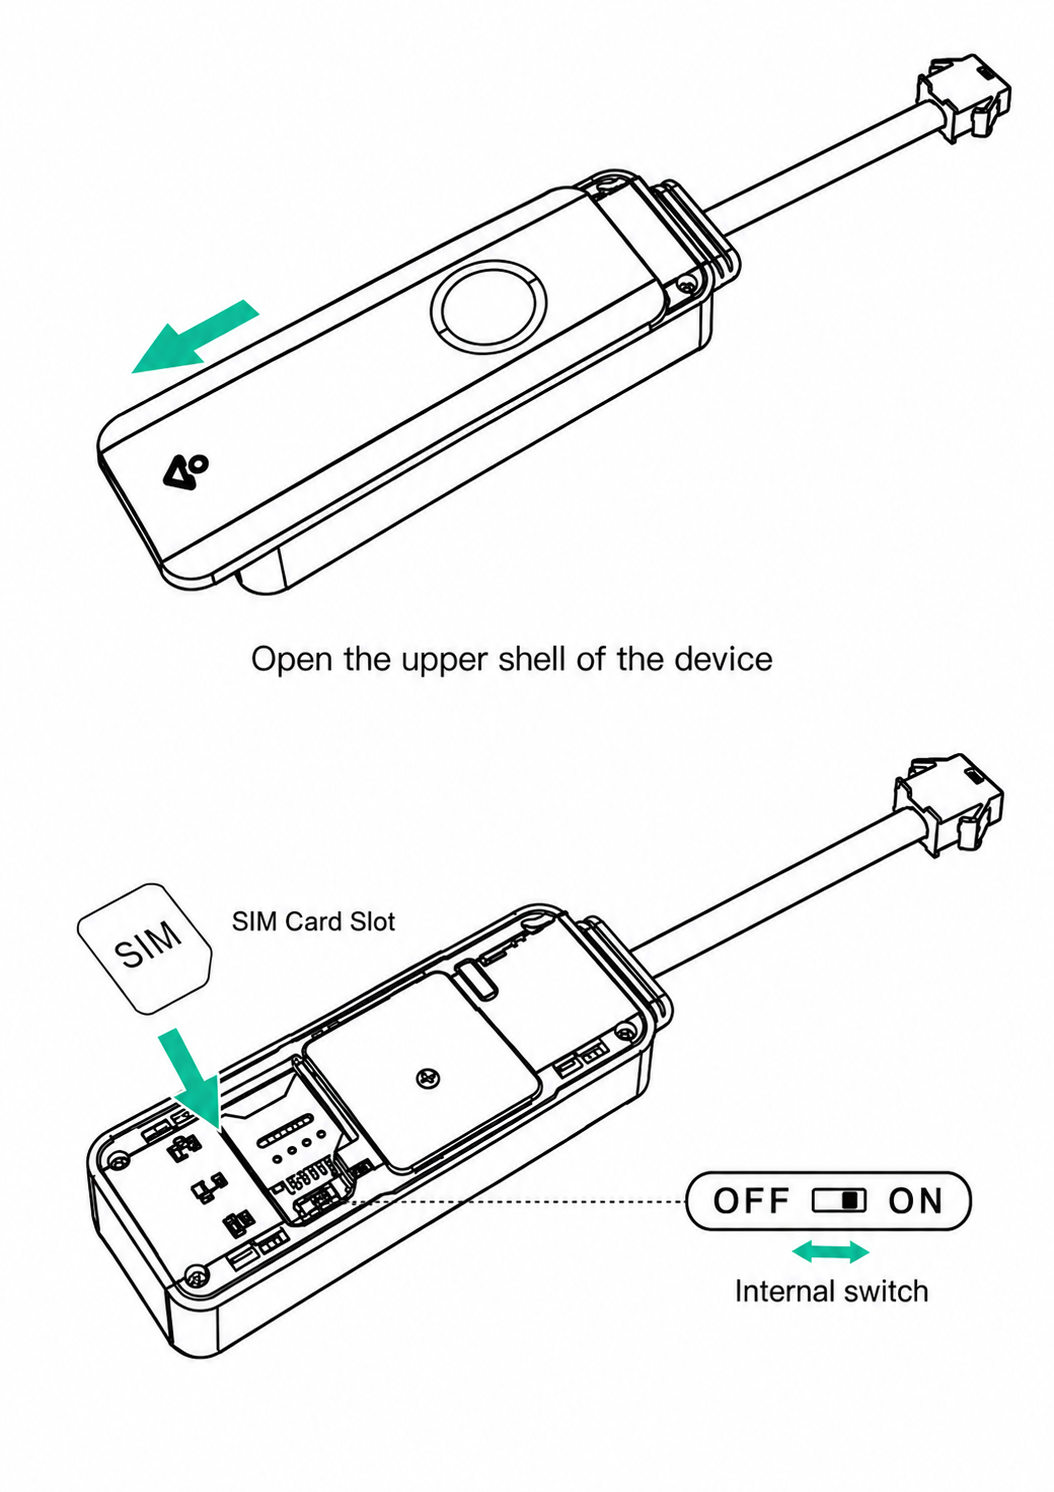
The device ships with its internal switch in the OFF position. You need to open the shell and turn it ON before installing.
Slide off the upper shell of the device (pull in the direction of the arrow shown on the housing).
Locate the internal switch near the SIM card slot.
Slide the switch to ON.
The indicator lights will start blinking, confirming the device has powered up.
Close the shell.
Choosing a mounting location
Where you place the device affects GPS accuracy and device life. Follow these rules:
Once positioned, secure the device with a cable tie or sponge double-sided tape.
Wiring the device
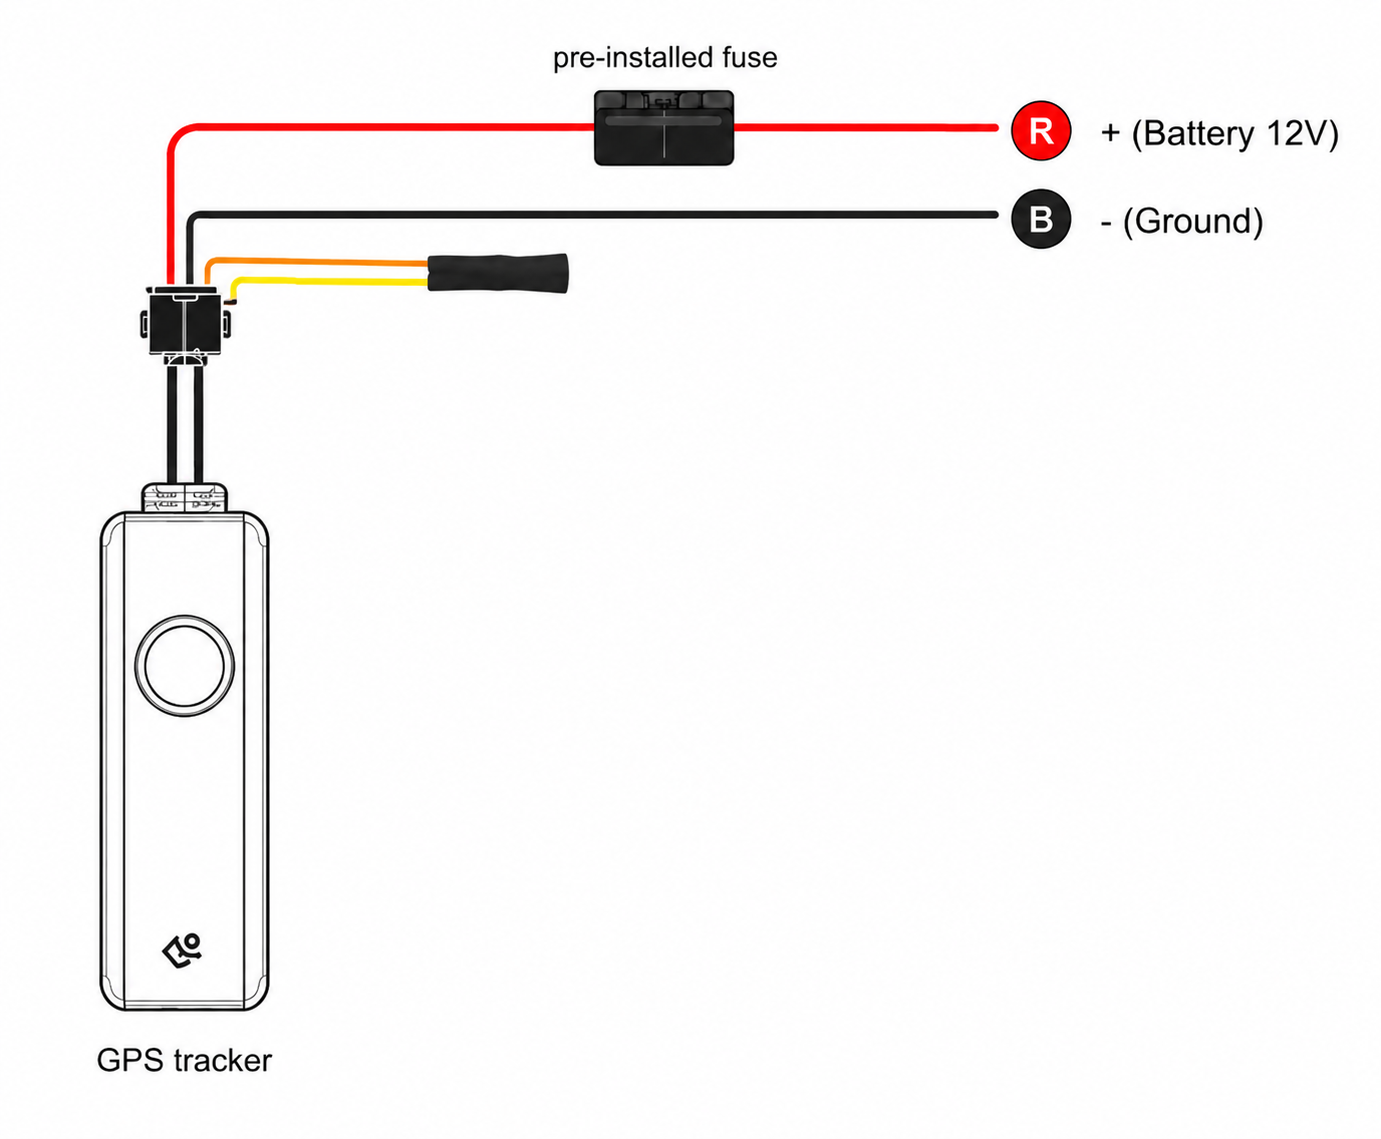
The GS900 uses two wires. The orange and yellow wires are not used — leave them insulated and untouched.
An inline fuse is already installed on the red wire — do not remove or bypass it.
Steps
Locate the vehicle's 12V battery.
Connect the black wire to ground (−).
Connect the red wire to the positive (+) terminal.
Confirm the orange and yellow wires remain insulated and are not touching any terminal or metal surface.
Verifying the installation
After wiring is complete and the switch is ON, use the indicator lights to confirm the device is working.
Startup sequence
On power-up, the indicator lights start blinking.
If the device is running on its internal battery, the red power light slowly blinks after you turn it on manually.
After a few seconds, the LTE light and GPS light become steady. The device has now entered normal working status.
Indicator light reference
Reporting behavior
Once installed, the device reports location on the following schedule:
Troubleshooting
Next steps
Once the device is installed and verified, complete setup in the Fleet Portal: